Star Wars: Empire at War Walkthrough
It's time to save the galaxy yet again...or conquer it. GameSpot's Walkthrough to Star Wars: Empire At War will show you how.
Design: Randall Montanari
The fortunes of LucasArts over the years have been pretty interesting. While they used to be renowned for their classic adventure games and great fighter simulations, around the time the Star Wars prequel films starting coming out, they began cranking out sub-par Star Wars games almost exclusively. Games like Force Commander, Galactic Battlegrounds, Rebellion, and Obi-Wan for the Xbox just never lived up to the standards of quality set by LucasArts' previous titles.
Over the last couple of years, though, LucasArts has turned the ship around by focusing on producing better-quality titles. Games like Knights of the Old Republic, Republic Commando, and Mercenaries were all superb games in their own way. And although the RTS genre has always been an unlucky one for the Star Wars license, Star Wars: Empire At War aims to continue the recent tradition of excellence for the license, and definitely seems capable of doing so.
In Empire At War, you'll take on the role of either the Galactic Empire or the Rebel Alliance, and guide your faction across multiple planets, fighting both on ground and in space, in an effort to restore peace and/or order to the galaxy. GameSpot's Game Guide is here to help you in your mission, with a complete walkthrough of the game's two campaigns, a rundown on all the units and heroes, some general tips, and a guide to each of the planets in the game.
General Tips
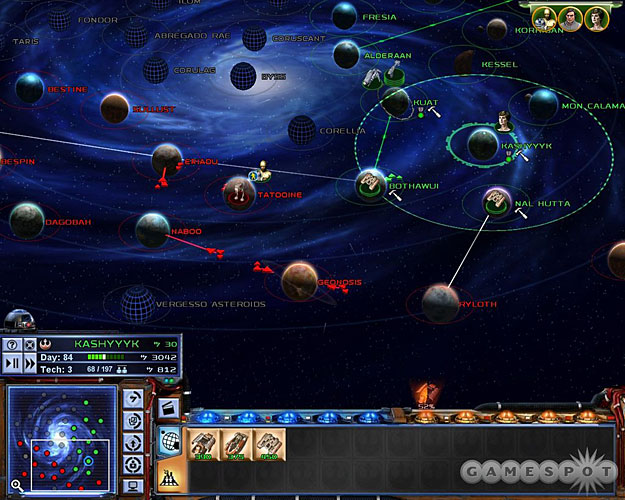
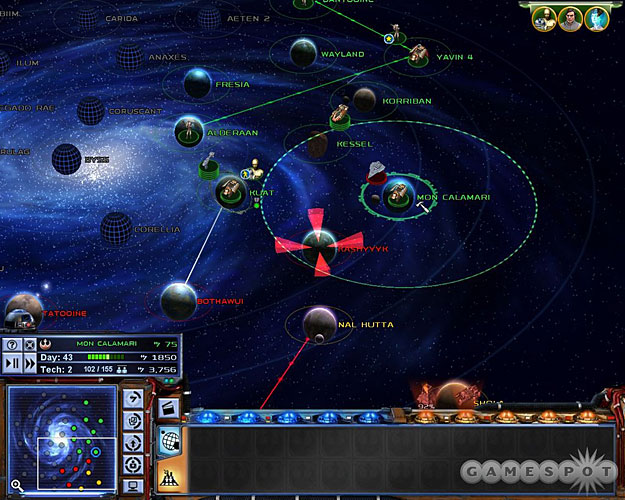
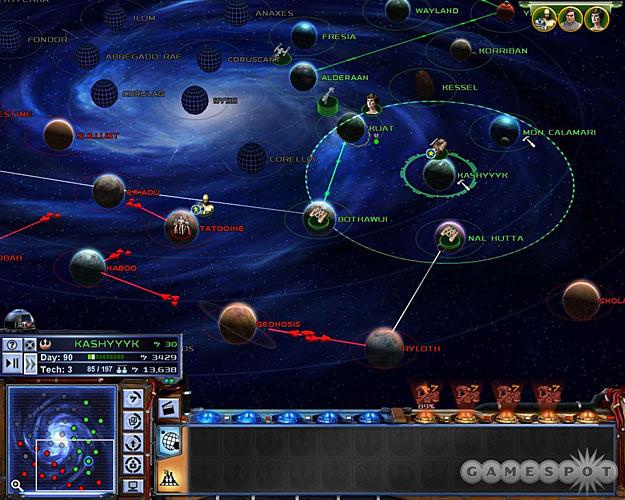
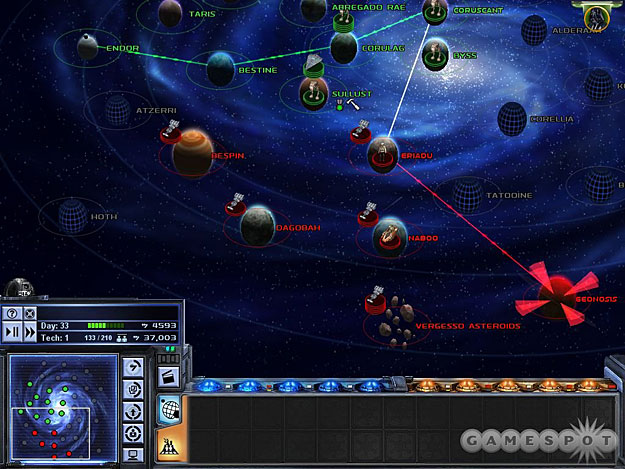
Galactic Map
One of the keys to success on the Galactic Map is to consolidate your planetary holdings so that you're not facing attack from too many directions at the same time. Generally speaking, you're going to want to tackle any enemy planets that are cut off from the rest of your enemy's territory before making a strike at the heart of their empire. Planets that are cut off might not be undefended, though, so be sure to send a spy or a Probe Droid to check things out before recklessly committing a huge army to battle. Sometimes the planet might have a large stack of space units waiting on it; unable to move without attacking one of your planets, they're usually more than happy to defend their system to the death.
As the battle lines shape, up, though, you'll often find that two or three systems wind up being the points of intersection between you and your enemy. Defending these units and preparing your forces for an assault is one of the key things to learn about managing the galactic map. Here are some pointers to get you started.
Exploit Your Hinterlands
One aspect of the computer opponents that you can take advantage of in Empire At War are their apparent inability to attack your rear planets. If they manage to win a space battle at one of your planets that neighbors their territory, but get rebuffed in their ground attack, they'll usually just keep their space units parked above the planet while waiting for another army to come along. One way to exploit this courtesy is to completely empty most of your rearguard planets of troops and ships; if your opponent will never attack it, then you can concentrate all of your forces on the border worlds, and simply use your planets further back as pure mining facilities. Some of them will be useful to you as production factories, as well, especially when it comes time to build units like artillery or the AT-AT, which take a long time to produce; you can build your armies more quickly by constructing multiple units on many different planets at once, then moving them up to the border as they're constructed. If you've got a well-protected planet that you know isn't going to be attacked by your opponents, however, feel free to fill it up with mining facilities and forget about it.
By the same token, you don't really need to build a maximum-strength starbase at each of your planets, especially those in the rear. If you have a planet that's just behind your borders, then feel free to build it up to the point where it can build your powerful space units, but most of your planets in the backwater parts of the galaxies shouldn't need a starbase at all, and probably won't need any production facilities on the ground, either, besides a bunch of mining facilities. You can give them a level one or a level two starbase, if you like, since those aren't very expensive and will help in an emergency, but the later stages are a bit cost-prohibitive, especially if you're also trying to build up your forces to attack your opponents. The main benefit of having larger space stations is that your population cap becomes larger, but later in the game (the single-player campaigns, at any rate), this isn't such a big deal, as you'll have a population cap of hundreds of units.
Hold The Line
Sometimes all you need in a galactic campaign is a little time to earn some money and build up your forces. When you've spread out a bit from the starting point and have a good little line of planets that border your enemy's territory, it becomes important to prevent them from entering your territory and capturing your planets. Generally, though, if you plan ahead and fortify the planets that border your enemy, then you should be able to make it through most scenarios without ever getting a planet captured by your opponent, given a little time.
Oddly enough, the key to defending planets doesn't revolve around building up space stations and large fleets. Instead, we only have one word to say to you: shield generators. While most RTS games give players the opportunity to defend their territory, the inclusion of shield generators and turbolasers on planets makes it exceedingly easy to go on the defensive in Empire At War, especially considering the computer's often unintelligent AI in ground battles and its apparent inability to move a space fleet past one of your occupied planets. You'll often want to build either a barracks or a factory of some sort on the planet, as well, to obtain garrison units as well as in-combat upgrades. (You can see more about shield generators in our Ground Battle Strategies section below.)
In any case, your best bet when attempting to marshall your reserves is to just have your planets that border your enemy's planets to have a shield generator, a turbolaser, some factories or barracks, and as many units as can fit on the planet. Artillery units are ideal for garrisonning a shielded planet.
Space Battle Strategies
Don't Forget The Turrets
While turret-building is a common feature of land battles, there are also build points for turrets in space, as well. They show up on the map as large grey dots, and appear somewhat cylindrical when viewed on the screen. If you claim one of these spots for yourself (by moving a fighter or a bomber near it), you'll be able to build either a laser cannon or a missile turret. Laser cannons are great anti-fighter and anti-bomber units, while missile turrets work best when firing on enemy capital ships.
Unfortunately, turrets are probably still more useful on the ground than in space. Most of the time, space turrets are in the middle of the map, and it seems as though your opponent will often reach them before you do in the beginning phase of a map. What's more, they take quite a bit longer to construct than ground turrets do, so if you get into a firefight in the general area of the turret, it'll often be targeted and knocked out before it can even be fully built.
In skirmish mode, however, space turrets can be a great help, since there are platforms near many of the mining facilities on most maps. A simple laser turret can be a helpful (albeit expensive) safeguard against enemy fighters attempting to take over a mining facility.
Target The Hardpoints
One of the cooler aspects of Empire At War is the way in which you can target individual systems on the game's larger ships. Most capital ships have many individual systems, such as engine, shield generators, turbolaser batteries, and so on. When you attack one of these ships, you'll be able to target a specific system to attack. If you click on the ship in general without attacking a hardpoint (as the systems are referred to), your units will pick one to go after. If you have a large number of units attacking the same ship, though, they'll often pick different subsystems to hit, which is suboptimal; ideally you'll have all of your ships targeting the same subsystem to knock it out, then going after subsequent ones in turn.
It might be confusing to see all of the possible targets on a ship, though, so we'll say it straight: most of the time you're going to want to take out either the hangar or the shield generator before you take out anything else. Only Imperial ships have hangars, but they're greatly annoying, in that they'll issue fighters and bombers constantly. As the old fighter and bomber wings are destroyed, more will come out of the hangar... but if you knock it out, they won't be able to issue forth, and thus you'll essentially be killing them before they ever come into existence. This is even more important in the case of space stations, which have no upper limit to the number of squadrons they can pump out. While Star Destroyers will eventually run out of TIE Fighters, space stations will continually pump out the squadrons. Since stations take so long to kill, it's usually worth your while to take out the hangar before hitting anything else, or at least prioritizing it somewhat.
Another good target for your fire are the shield generators on capital ships. If you can take down the shield generators for a ship, their shields will instantly drop and will be prevented from recharging over time, as they normally would. Of course, the whole point of shields is that they prevent you from actually hitting the ship itself, so if you don't want to have to drop the shields with normal fire, you should have your bombers work on the shield generators. Bombs from Y-Wings and TIE Bombers pass through shields to impact hardpoints directly, so they're ideal for dropping the shields and allowing the rest of your units to do their thing.
Ground Battle Strategies
Shield Generators!
When you start a defensive battle on a planet where you have shield generators, the first thing you'll want to do is withdraw all of your units to the area covered by the shield. Then, if you have the cash, pay the 900 credits to upgrade your shield generator so that it repels all types of projectiles. By default, it'll repel laser fire and bombing runs, which is great, but if your opponents come at you with rockets, you're going to wish you had shelled out for the upgrade. When you get an idea of the direction from which your opponents will be attacking, move your artillery units within striking range of the edge of the shield, and put smaller vehicles or artillery units in front of the artillery to protect. Just keep in mind that the shield isn't perfect; if your units are standing too close to the edge, they can still take damage, even if it looks like they're protected. This is especially true when your enemy drops a bombing run on the edge of the shield, or attack you with anti-air units.
Now, some planets, perhaps even most of them, will put your power generators outside the radius of your shield, so they'll be vulnerable to enemy fire, and if the generators get destroyed, then your shields will drop. The enemy AI isn't necessarily smart enough to head straight for your power generators, though, so in many cases they'll still try charging through the shields and head for their doom. Their dooooom!
RAID?!?!!
Although it's not immediately obvious what the Rebellion's "Raid" ability is for, if you play around with it a little bit, you should find it to be quite handy. Basically, a raid allows you to make a very small stack of ground units and land them on an enemy planet without having to attack the enemy ships in orbit, meaning that you can immediately start a ground battle by dragging the stack of units to the "Raid" slot on the enemy planet. You'll know whether or not your stack is small enough by looking at it on the galactic map. Raid stacks will appear with a small star by them.
But when we say a "small stack", we mean small: you can only take three units or so into the fight, which means that you'll have to clear the entire map with just those units, and no backup, and no bombing runs. Your success will largely depend on your tactical abilities and the enemies that you're going up against; if your enemy has turbolasers and five AT-ATs on the planet, it's going to be exceedingly difficult to take it with just three units, but that's actually a fairly rare occurance; when fighting against the computer, you can often expect them to have fairly light garrisons. On some planets, like Kashyyyk and Mon Calamari, you can also rely on the friendly units that spawn out of the indigenous population for help. Anyway, our general favorite raid group consists of an MPTL-A artillery unit, a T-4B tank, and a group of Infantry or Infiltrators with which to capture build pads.
Dealing With Defenses

As we mentioned earlier, some of the best defenses you can have in a ground battle are turbolasers and a shield generator. So what do you do when you're attacking an enemy that has both of those structures available to them? You go straight for the power generator, of course. The power generator gives power to both the shield generator and the turbolaser batteries (as well as some other structures, such as the Magnapulse Cannon); when it's destroyed, all of those structures will lose power and thus become nonfunctional.
But how to take down the power generator? Well, if you're lucky, you're attacking your opponent on a planet that has the power generator located outside the shield radius. If this is the case, then you can try to locate them, then call down a bombing run on top of them. A single bombing run should be enough to pound a power generator into submission. If you don't have any available, well, you'll have to get there somehow and blow it up the old-fashioned way.
If the power generator is inaccessible or hidden underneath the shield generator, then you'll have to find more creative ways to bypass turbolasers and shields. Turbolasers are primarily anti-vehicle units, so if you need to get past one, it's usually best to just rush it with infantry and fire from point-blank range. Turbolasers can't fire at any unit within a few feet of its base, so if you crowd around it, your infantry should be able to take it down with a little blaster fire. If you have any shielded vehicles, like a 2-M or a T-2B, then they may also be able to rush the turbolaser, especially if you don't mind if one of them gets destroyed. Artillery units can obviously also be used to take down turbolasers from afar.
Dealing with a shield generator is a bit more mystifying. In order to get underneath a shield, you have to physically pass through it. The computer isn't always on the ball about protecting the edges of its shield generator, so you'll have an easier time of it than they usually will. It helps to head through first with shielded vehicles, then follow those up with your artillery units; when you're under the shield, deploy the artillery and start creeping up towards the shield generator. Proper tactical combat ability will see you win the day, and when the shield generators are down, you can shift into a defensive position and use your bombing runs to damage any buildings that are producing garrison units.
Note that the Rebels can also often deal with shield generators by quickly landing some Speeders at the beginning of a fight and flying them in to attack the generators directly. The computer, at least, will usually build anti-air turrets near their base, but these take time to come up, so if you move quickly you can often take down the shield generator or power generator before your Speeders are threatened by any ground units. Of course, if your opponent starts out with AT-AA units, then this won't work, but it's worth a shot!
Rebel Alliance Campaign
The Alliance campaign is arguably a bit more difficult than the Imperial campaign. You're going to be more pressed for cash than you probably will be in the Imperial campaign, due to having fewer planets under your control, and that problem will likely be further compounded by the fact that you have to construct and pay for X-Wings and Y-Wings (where the Empire would normally get them included with the cost of their frigates and Star Destroyers). If you're up for a challenge, though, the Alliance campaign can definitely offer that.
Prelude: Kuat
Objectives
- Destroy the six Imperial Shipyards.
- The Sundered Heart must survive.
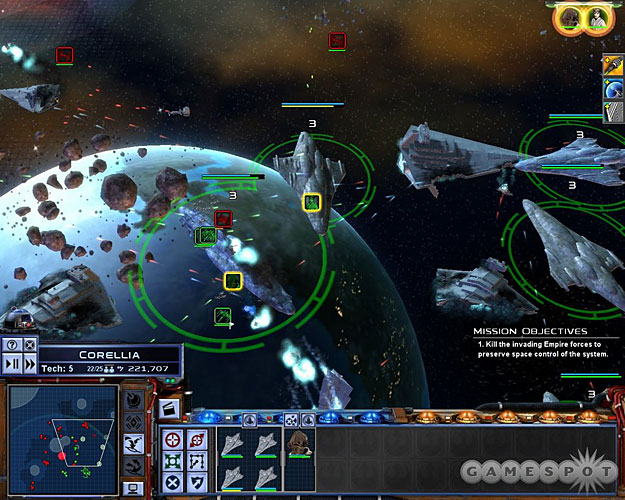
The first mission for the Rebels take place at Kuat. They need to get the Tyranny, an Imperial-class Star Destroyer, away from another system, so in order to lure it away from its post, they're staging a diversionary raid on the shipyards at Kuat, led by Captain Antilles and a small fleet of speedy Corellian Corvettes.
This mission is something of a cakewalk, really, as the shipyards are lightly defended and are surrounded by convenient gasoline-filled barrels. Well, we guess technically they're called "Orbital Resource Containers", but the idea is the same as you might be familiar with from any given FPS: you shoot the container, it blows up, everything around it blows up, etc. You can't be hurt by the explosions, so just target the containers and let them do the hard work of destroying the shipyards.
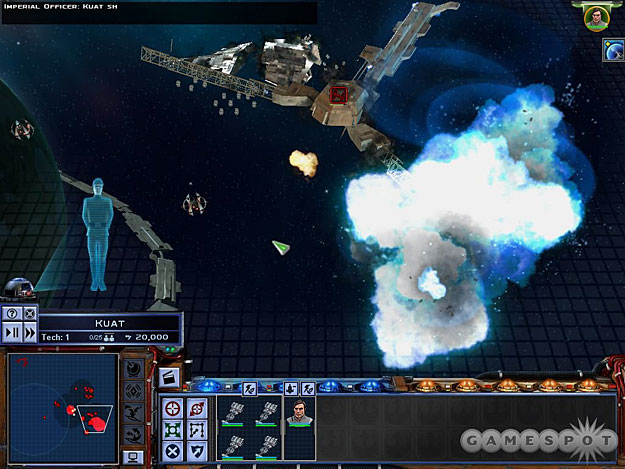
Your only real threat here will come in the form of enemy Tartan Patrol Cruisers, but with five ships, you should be able to deal with anything that gets in your way. The stationary laser cannons are likewise mostly unthreatening. Push your way through the six shipyards to finish the mission.
Mission One: Interpreting The Network
Objectives
- Take R2-D2 with a ground force to Wayland and have him steal codes from the Imperial Network.
Now that you're on the Galactic Map, feel free to consolidate your systems and build up your forces a bit. You're still in the technological Stone Age compared to where you'll eventually wind up being, but at least Yavin can construct T-2B vehicles for you, and if you upgrade your systems to level two starbases, you'll be able to build more Corellian Corvettes. Kuat should hopefully be almost undefended (scout it with C-3PO before moving there), so if you build some troops to attack the ground forces there, you should be able to add it to your stash of planets before you even head out to Wayland.
When you're ready to complete your mission, though, bring a large stack of ground forces to Wayland, including C-3PO, and land them.
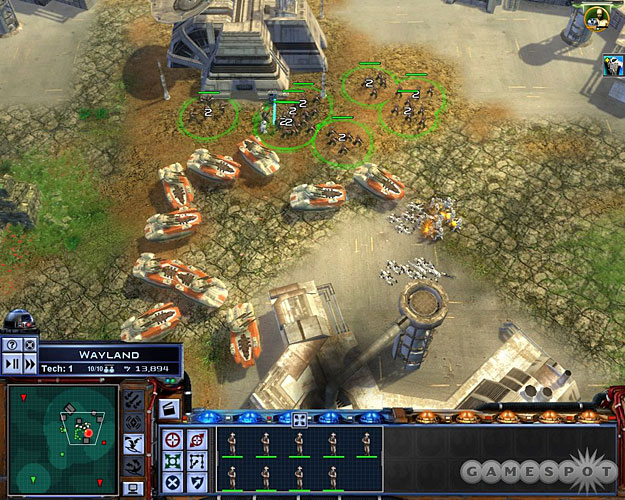
Luckily for you, you're going to have a large population cap on Wayland; ten full units. Use the space to bring down a roughly equal number of T-2B's, Infantry units, and Plex Soldiers; you're going to need all of them to win. The easiest way to proceed will be to make separate groups for each type of unit. You can do this by selecting all of your T-2B's, for instance by double-clicking on one of them, and then typing CTRL-1 to assign them all to first squad. Repeat this with the other unit types by hitting CTRL-2, CTRL-3, and use CTRL-4 for C-3PO and R2D2. With these commands inputted, you'll be able to hit the 1, 2, 3, or 4 keys to quickly switch between unit types.
Move your T-2B's up the forest passage and destroy the turret there, but keep your Plex Soldiers at hand to let them deal with the AT-ST's that are residing in the main enemy base. You can clear out the base pretty easily, but just make sure that your T-2B's lead the charge; there's an anti-infantry turret in the base that will rip through your troops if you get them too close to it.
When you've cleared out the base, be sure to head to the east a bit and destroy the other anti-infantry turret there. You can build your own turrets on these spots by moving one of your infantry units near it, then right-clicking on the buildpad when you've taken control of it. Try building anti-vehicle turrets on the pads to the south and the east; the one in the middle of the base should probably be either a Bacta Tank or a repair arm for your T-2B's.
When R2 and C3PO move towards the uplink station and start working on changing the codes, the Imperials will land more units and attack, first from the south, then from the west, then from the southeast. With your speedy T-2B's, you shouldn't have a problem intercepting their attacks and rebuffing them; just be sure to manage your units. Keep your Plex Soldiers firing on the AT-ST's and your infantry units focused on the Stormtroopers.
The last wave of enemies will feature some TIE Maulers, which move quickly and which can self-destruct, so try to park a few Plex Soldiers near C3PO before the last wave commences. If you can blow up the units before they reach C3PO, then you won't have to worry about the damage from their self-destruction.
When all of the units are dead, you've won! Get C3PO and R2D2 back to your landing zone, you'll take off again, with your mission accomplished.
Mission Two: Theft of the X-Wing
Objectives
- Take a ground assault force to Fresia and steal the X-Wing prototypes.
- Ground Battle: Escort the pilots to the X-Wings.
- At least one pilot must survive.
- Destroy the Power Generator.
Not much changes on the galactic map between the previous mission and this one, but you can take over Wayland, and probably Korriban as well, if you haven't already. When you're ready to move out to Fresia, though, build up another stack of ground units and move them over there. No need to bring C3PO along this time. Since there aren't any space units in orbit around Fresia, however, bring along some Y-Wings to take advantage of their bombing run capabilities during ground battles.
When you hit the ground, you'll find that you have a maximum unit capacity of five units, not including the small squad of pilots that you're given control of. Your ultimate goal here is to reach the X-Wings on the eastern edge of the map, and bring at least one of the pilots to them so that you can steal the fighters and finally have a ship capable of taking on the dreaded TIE Fighter. Unfortunately, the X-Wings are guarded by Turbolaser Batteries, which will rip apart your T-2Bs if they get too close. To eliminate that threat, you'll have to deal with the main generator, which supplies power to the turbolasers.
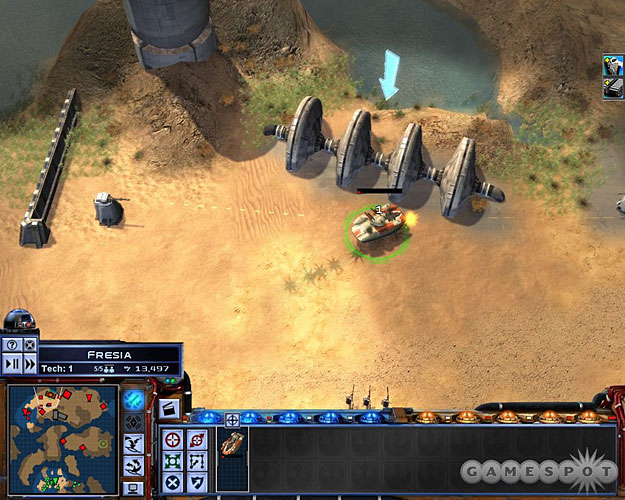
There's an easy way to do this, and a hard way. The easy way is to bring down a lot of units at your initial starting point, including more T-2B's. When you've hit the population cap, and have waited for a bombing run to become available, you can easily take out the power generator by selecting a single T-2B and running it quickly up the western part of the map, past the second reinforcement point, and up near the generator. In order to call in a bombing run, you have to be able to actually see your target, so if you get the T-2B next to the power generator, you'll be able to bring down your Y-Wings. The T-2B will be destroyed, of course, but it'll be worth it. With the generators destroyed, you can move the rest of your troops up to the northeast, keeping the pilots protected, then eventually moving them into the X-Wing pen and taking them out.
Alternately, if you can't drop any bombs, then you'll have to take your troops up the western side of the map, avoiding the turbolasers, and then take over the reinforcement point before slogging your way through the enemy base and destroying everything you see.
Regardless, when you reach the X-Wings, you'll learn of anti-air turrets popping up all over the place. The four nearest the X-Wings will be destroyed easily, assuming you still have enough units alive, but the four in the center of the map are going to be more difficult to take out. If you do have bombing runs, the easiest way to hit them is to just drop a bombing run right on top of them. They are anti-air turrets, so they'll shoot down your Y-Wings, but they won't be able to stop the bombs from falling, and at least a couple of the turrets will get taken out. If you can defend your position long enough to wait for another bombing run, then that should finish them off and win the mission for you.
Mission Three: Kessel Rescue
Objectives
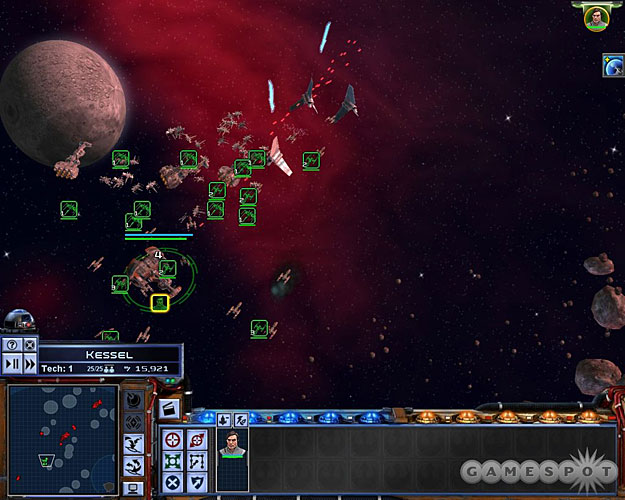
- Use the Y-Wing Bomber's Ion Cannon special ability to immobilize the convoy's shuttles, then rescue the prisoners with the Sundered Heart.
Ignore Mon Mothma here; go ahead and land on Fresia to take it over. You just wiped out the Empire there, so why not convert it to your cause?
So apparently the Empire is transporting the scientists on Fresia that were helping you out to Kessel. They're doomed for a life in the spice mines if you can't free them! Luckily for you, you can disable their engines with your Y-Wings, then pick up the scientists with Antilles' ship.
The basic process here isn't too difficult. Make one large group of X-Wings and Corellian Corvettes, at least three groups of Y-Wings, and keep the Sundered Heart in its own little group. The X-Wings and Corvettes should engage any fighters or Acclamators that come your way, while each of your Y-Wing groups will target one of the shuttles (they come in groups of three). The Sundered Heart can approach the incapacitated shuttles and pick up the passengers without too many problems.
After you nab the first three shuttles, you'll get a message warning you of two Imperial Star Destroyers that are on their way into the system. Don't worry about it, though; you should be able to nab the remaining three shuttles with time to spare. The key thing here is to split up your Y-Wings into groups of two and three; if you have them all charging their Ion Cannons at one ship, it'll take them a while for their cannons to recharge, so you'll probably wind up losing one or two of them.
Regardless, when you get all six of them taken care of, you'll win the mission and will be able to move on.
Mission Four: Stealing From The Rich
Objectives
- Drag the droids onto the Steal action on an Imperial planet to steal technology.
For some reason, your ships leave Kessel after the battle; head straight back and take it over with ground troops. You have new technology now, including third-level Space Stations, Nebulon-B Frigates, and Officer Academies. Take a look at your options and build what you like, using Mon Mothma to defray the costs, especially on the Nebulon's and the new space stations.
When you're ready to steal some tech, drag C-3PO onto Mon Calamari and plop him into the Steal icon. You'll be able to buy any of the technologies that are available there; we recommend starting with either the Marauder Cruiser or the Heavy Factory. You'll be able to buy them all eventually, though, so don't worry too much about what your choices are.
Mission Five: Imperial Liberation
Objectives
- Send a ground assault force to Kashyyyk and assist the crusader in freeing as many Wookiees as possible.
- Ground Battle: Destroy five Imperial prisons.
- Han Solo must survive.
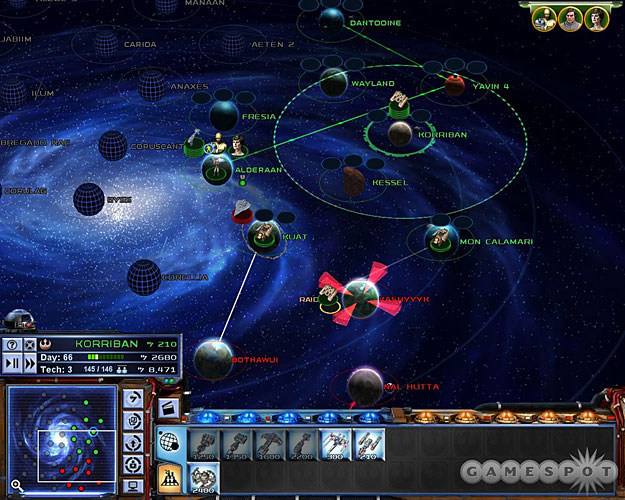
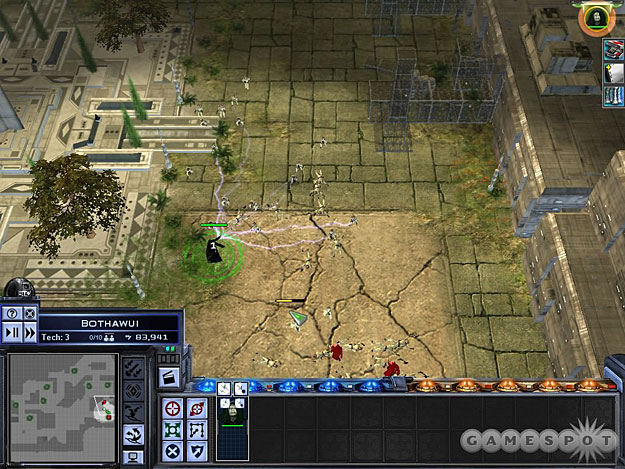
It'll take a while after C-3PO steals his technology before you'll be able to take on another real mission; there's a lot of talking involved. Anyway, the galaxy will open up a bit, revealing more systems to be taken, including Mon Calamari and Bothawui and more systems to the south. Be sure that Mon Calamari is under your control, as well as Kuat. Before you attack Kashyyyk, these two systems are going to be your primary points of contact with the Empire, but if you defend them well, you should be able to hold them to the south and take advantage of this time to steal more technology and build up your fleets a bit.
After you take over Mon Calamari, quickly plop down at least one artillery unit there and build a shield generator to protect your troops. It's very difficult for the Empire to win ground battles here if you have a shield generator, since there's only one entrance to your base to defend which is surrounded by buildpads. You'll also have a huge number of sacrificial Mon Calamari to use to defend the area. So if you can build a shield generator and fill the planet with troops, you should be able to win any ground battles here with ease. Don't bother making a space station here yet; just let them attack you if they wish. Kuat is where your fleet should be stationed; if it's large enough, the Empire won't bother to attack.
During these maneuvers, keep stealing with C-3PO until you can't steal anything else. You'll get up to an Assault Frigate, at least, which will help you take down the Victory-class Star Destroyers that will be popping up in the Imperial fleets from time to time. When you're ready to attack Kashyyyk, scout it out with C-3PO, send in a fleet to attack it, then bring down some ground troops to meet up with Han.
Now, if you wait too long before moving on Kashyyyk, the Empire will take control of it and likely outfit it with a large space station and fleet. If this occurs, you'll have to attempt a raid. You can indeed win this battle with a small group of soldiers; we attempted it with a set of Plex Soldiers, a MPTL-2A, and a T4-B Tank. It's difficult to do with a small group like this, but not impossible.
Ground Battle
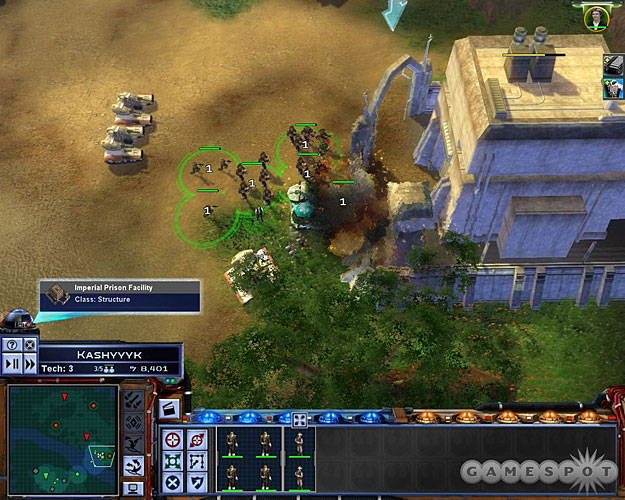
All right, your goal here is to destroy five of the Imperial prisons on the planet. They're hardened structures, but not unkillable. In addition to whatever units you brought along, you should also have a small squadron of infantry. Deploy your artillery as soon as you begin the match, though, and use their spotter units to kill off the nearby Stormtroopers. With that done, you can move your T-4B's up and around the corner to destroy the anti-infantry turret, and then bring all of your troops around to start smashing one of the prisons. Your vehicles are important to keep alive, so build a repair station near the prison and use it to heal up your T-4B's, which should be close to the river so that they take the fire of any units that approach your position. (Note that Han can also destroy prisons with bombs, if you move him into the archway with the floating arrow above them.)
When you've killed both of the prisons, you'll have gained a few Wookiees for your army. If they're unarmed, move them towards the nearby Wookiee structure to get them some bowcasters, and group them up with your infantry. At the very least, they'll make for good cannon fodder.
Move across the river, using the artillery to destroy the infantry there, then destroy the prison there, and build a bacta tank nearby to heal any of your infantry units that might need it. Continue this process of scouting the area around the prisons for turrets with your sensor pings, then moving up your infantry and other units as appropriate to destroy the structure itself. The Empire doesn't have an infinite number of vehicles to work with here, so you should be able to wear them down over time if you heal your units back up when they get damaged and proceed cautiously.
When you destroy all five Imperial Prisons, you'll win the battle and take control of Kashyyyk. If you managed to capture it during a raid, you'll also have the bonus of destroying whatever space station the Imperials had constructed.
Mission Six: Highest Bidder
Objectives
- Build a fleet and escort Captain Antilles to Atzerri to recover the stolen data.
It's during this mission that your galactic map starts to get complicated. The Empire will quickly establish themselves throughout the southern end of the galaxy, leaving you with a mighty large number of planets to overtake before you can reach Atzerri. If you're going through methodically, which is probably a wise idea, start building up your fleet and try to establish yourself on Kashyyyk. No need to build a space station or large space fleet there, particularly; keep Kuat as your space headquarters, but build a shield generator and turbolasers on Kashyyyk, as well as perhaps a Light Factory. During ground battles, you'll have dozens of Wookiees on your side, so that should be enough to pound any enemy forces that attempt to attack you there.
From Kashyyyk, you'll probably want to take out Bothawui before heading down to Nal Hutta. The Empire can jump from Bothawui to Kashyyyk, so taking Nal Hutta first will open you to attack on three planets, which is difficult to defend against. Again, the process isn't horrifically complicated; take over a planet, by raiding it if necessary, then immediately build a shield generator and turbolasers, if you can afford them, and then probably a light factory would be best for at-risk planets. With these systems in place, you can often defend a planet with just three or four units, if properly managed in combat.
Anyway, the first few planets you want to take out are, in this order: Kashyyyk, Bothawui, Nal Hutta, Ryloth, and then Shola. Ryloth and Bothawui can be your impenetrable ground bases; if you build them up as outlined above, then you should be able to repel any ground assaults from the Empire. It won't matter if they park their fleets above the planet; just let them sit there and wait until you have a large enough fleet to take them down. As mentioned, they won't penetrate any further into your territory.
When you're ready to sweep out, build up your troops and start working your way through the rest of the available galaxy. It'd be best to control all available planets before hitting Atzerri with your fleet, obviously, but if you can smash their one or two large collections of ships, that should be a bit easier to manage, as they don't seem to be willing to rebuild them overmuch, leaving a bunch of relatively underdefended planets for you to autoresolve your way through.
Space Battle
When you hit Atzerri space, you're going to find the pirate you're looking for...as well as a full Imperial fleet that has come along for the same little prize. They're going to have an Imperial-class Star Destroyer, as well as a couple of Victories, so this fight can be difficult, but it's not impossible, especially with the huge fleet you should have by now. If you bring along Marauders, you'll hopefully have a few of them, and they can actually do a surprisingly good job at weakening the ISD. If you have Y-Wings, they can also, of course, smash its shield generator and hangar to further dismantle its defenses before attacking it with your Frigates.
Your primary goal here, though, is to disable the pirate ship by attacking it, then getting the Sundered Heart on top of it before the Imperials can reach it. The ship can move in some odd ways, so be sure to quicksave your game before you really start pursuing it. The Imperials will be firing on it, as well, and if they disable it, you'll still be able to claim it for your own, so be sure to use Antilles' Boost Engine Power ability to get on top of it before they reach it.
When the coast is relatively clear, bring in any reinforcements you need to finish off the Star Destroyers, then go after the Interdictors which are preventing you from entering hyperspace. Polishing them off will complete the mission.
Mission Seven: Rescue the Millennium Falcon
Objectives
- Take a fleet to Corellia and rescue Han Solo.
It's unclear what kind of trouble Han's in, but he's got attention of the Imperial kind, and if you want him to help you out in the future, you might as well rescue him now. Take your fleet to Corellia, but instead of sending the whole stack, break off just your Y-Wings and send only those.
Space Battle
When you reach Corellia, your Y-Wings will be facing off against three Imperial Star Destroyers, including one which has the Millenium Falcon caught in a tractor beam. Freeing it couldn't be easier; just task all of your Y-Wings on the tractor beam, and they'll run along and bust it! It seems to be somewhat weakened for this mission, so sending all of your Y-Wings is probably overkill, but hey; it couldn't hurt. All you really probably need is three or four, however.
After you break the Falcon free from the tractor beam, you'll automatically win the mission.
Mission Eight: Needle in a Haystack
Objectives
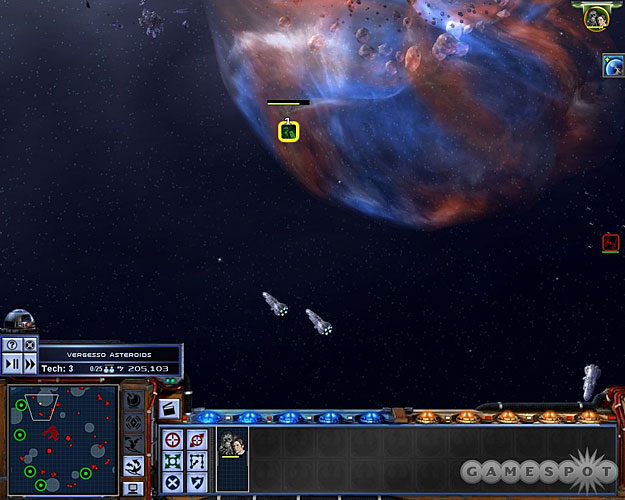
- Take Han Solo to Vergasso, find the cargo container bound for the research facility, and attach the EMP device to it.
Apparently one of the cargo containers in the Vergasso asteroids is going to be sent off to the research facility where the Death Star is being worked on, so the Alliance is going to take the time to try and send Grand Moff Tarkin a little pleasant. The plan is to have Han Solo fly in, avoid detection as best he can, and scan the various crates in the area to see which one is headed for the research facility, then plant an EMP device on it.
When you hit the system, you'll obviously only have the Millennium Falcon as your sole unit, so go ahead and make a stack of it and start scanning the cargo containers. The key thing to remember here is to stay out of trouble; while the Falcon can take on the TIEs fairly well, there are a couple of groups of Tartan Patrol Cruisers that will lay the smack down on it if they get too close. Watch for them on your map, and try to stay away from them as best you can. You'll definitely want to make your rotation around the map in a counterclockwise fashion, since that's the same direction in which the enemy ships travel. If you notice a group of Tartans following you, you may want to try hiding in one of the nebula fields until they pass by; this will only work if you're not currently firing on anyone, but you should also try to be in the middle of the nebula to ensure that they don't spot you.
Note that Boba Fett will eventually appear and make a beeline for you. He's a tough cookie, especially if you're also getting hit by other ships at the same time. However, one trick you can take advantage of is to lure him into a nebula field, where both of your ships' shields will be knocked out. With your Invulnerability power, though, you should be able to withstand all the damage he dishes out for ten seconds or so, allowing you to polish him off and get back to scanning.
There doesn't seem to be a particular crate that's always the one you were looking for; most of the time, you'll have to scan all but two or three of them until you find the one that you're looking for. You shouldn't have any severe problems with this, unless you get pounded by a group of Tartans. With your Invulnerability power, though, and your speedy little ship, the worst thing that can happen is that you'll have to run for a bit.
When you find the crate that's heading for the station, you'll automatically win the mission and move on.
Mission Nine: Borrowed Time
Objectives
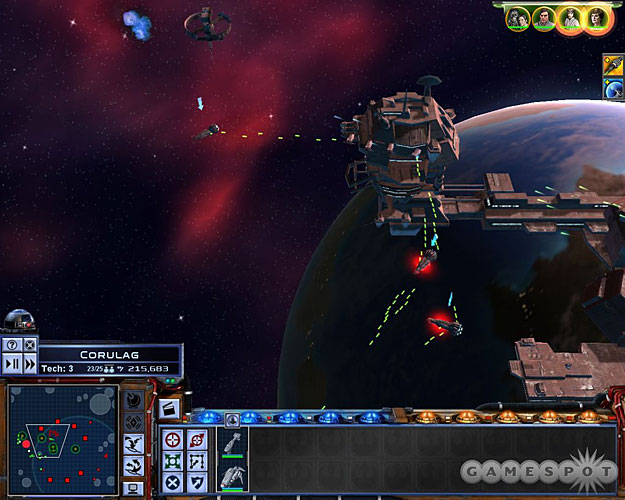
- Escort the fleet to Corulag and protect the shuttles while the soldiers search for information.
You've tracked the container to Corulag, where it'll shortly explode and shut down the Imperial space station there. Your goal now is to find more information on the Imperial superweapon, so you'll have to board the station and find the data before the EMP wears off.
Bring all the ships you can muster with you to Corulag, but if you have any Marauders on your stack, you might want to leave them behind; they tend to focus on the space station here, but your objective is to search it, not destroy it. Taking them away will free up room for another Assault Frigate, as well.
Anyway, at the beginning of the round, your four shuttles will automatically dock with the station here and start their search; your goal is to protect them from the ships in the system until they get the information they need and can retreat. Thus, all you really want to do is move all of your other ships so that they take up positions directly next to the shuttles, and then...protect them. That’s pretty much all there is to it! The ships in the system will "wake up" from the EMP effects over time; you probably won't be able to destroy all the ships in one wave before you can move on to the next, but it won't matter, as you just need to survive and keep the enemy ships from firing on your shuttles. Bring in new ships as needed to replace any that get destroyed, and you should polish the mission off without too many problems.
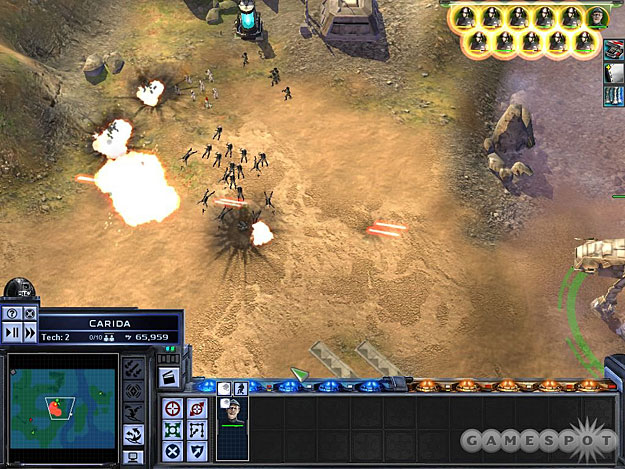
Mission Ten: Carida
Objectives
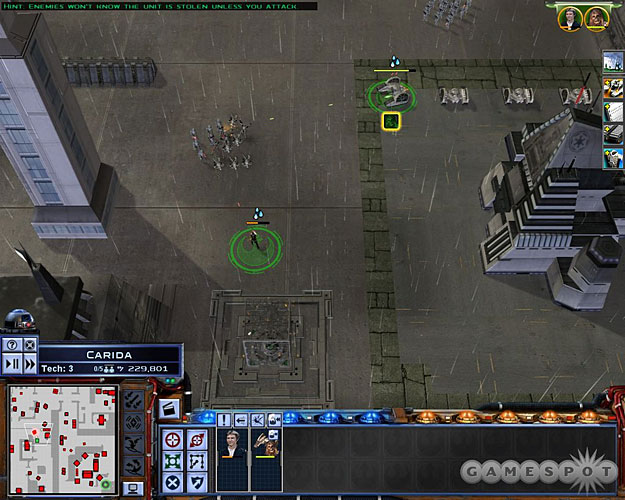
- Guide Han and Chewie through Carida to retrieve the plans for the Mon Calamari Star Cruiser.
Note that, after the Borrowed Time mission gets completed, you'll go through a longish conversation with Mon Mothma that will result in you automatically being sent to Carida with Han and Chewie. You won't be able to play around on the Galactic Map very much before it begins, so...well, that's just a warning!
Anyway, when you land on Carida, it'll be just Han and Chewie doing their thing; you won't have any other units to work with. If either of them die, it'll be game over, so take good care of them! Luckily, they're both pretty hardy, and you will have the opportunity to build a bacta tank or two along the way, so you should be able to stay alive if you proceed cautiously. Combined, the two of them can take down quite a few Stormtroopers without dying, so feel free to go to work.
After killing the first two squads near your start point, have Han sprint toward the two anti-infantry turrets nearby and EMP them so that he and Chewie can run on. Around the corner from them are more infantry units, as well as a build pad, so quickly get them to the build pad and construct a Bacta Tank. (You can run most of this mission at double-speed, as a note. It definitely helps speed things up.) When you heal yourself up again, you can start working on the remaining soldiers in the area, either by running up to them and firing at them with Han & Chewie, or nabbing one of the nearby TIE Maulers and running them down, which is just plain fun.
After you've cleared out most of the soldiers in the area, as well as the anti-infantry turret to the west, have Chewie hop into the AT-AT here and start attacking the AT-STs nearby. With them out of the way, move Han down into the lower corridor that runs north-south along the length of the map. He can draw the fire of any of the AT-STs and infantry squads that come north, while he and Chewie (in the AT-AT, still) take them down. If Han ever comes close to death, activate his Sprint mode to get him back to the Bacta Tank as quickly as possible.
When you've killed off all of the enemies roaming up and down the central corridor, move off to the east a bit and bring the AT-AT along to find the main generator. Blow the generators to shut down all of the turbolasers.
Return to the central corridor at this point and use the AT-AT to destroy the three turrets there. At this point, you may want to just ditch it, since you'll mostly be facing infantry from now on, which it doesn't do well against, but it may come in handy later on; if you do decide to ditch it, quicksave beforehand and reload if it becomes problematic.
Anyway, with Han and Chewie out and about, head south, killing infantry as you go, making periodic return trips to the bacta tanks to refresh their health. (At double speed, this shouldn't take long.) Be sure that you've killed all of the infantry near the storage depot, and that Han and Chewie are at full strength, before you hit up the storage depot.
With the information in hand, you'll be told to hit up a pair of shuttles to the north to escape the planet. The caveat is that four AT-STs, three Stormtrooper squads, and a pair of Scout troopers will all spawn and start heading for you as soon as you have the info. The Scout Troopers will hit first, so quickly eliminate them, then click on the shuttles that are your ultimate goal and book it! It's not worth trying to fight the Stormtroopers or the AT-STs. (If you have the AT-AT, you can probably live through the fights, however.) Instead, if you just run for the exit, you should have enough health to make it to the shuttles without taking lethal damage, especially if you use the Sprint ability to burst past the infantry units as they fire on you. If the Empire has rebuilt an anti-infantry turret, then you may have to have Chewie hop into one of the 2-M Repulsor Tanks near the storage depot and have him take the lead against the AT-STs and the turret.
Regardless, when you make it to the shuttles, you'll finally be able to build Mon Calamari Star Cruisers, at Kuat at least. You won't have much time to do so before the Imperials start coming at you, but at least you'll have the option!
Mission Eleven: The Defense of Mon Calamari
Objectives
- Defeat the Imperial Fleet before it reaches Mon Calamari.
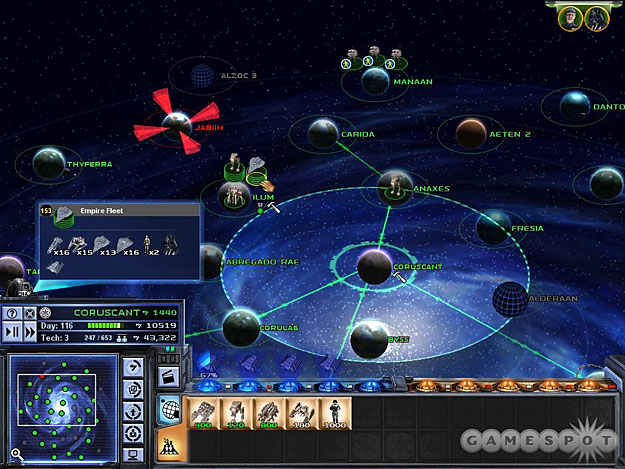
With over half the galaxy in your possession, the game becomes a bit more open at this point, with a long line of planets available for attack by the Empire. Instead of going after any of the obvious weak points, though, they're going to go straight for the main prize and push through your huge line to get to Mon Calamari. They'll be bringing a large fleet of ships (around 45 units worth, on medium difficulty) from Coruscant to try and retake the fish-people. If you've conquered all possible systems before this mission unlocks more of them, they'll likely head straight to Corellia with the fleet.
Luckily for you, Commander Ackbar and four Mon Calamari Cruisers will spawn at Mon Calamari a few moments after you get this mission. If you move them to Corellia as soon as they appear, they should get there before the Imperial fleet moves in, which will be helpful, since the Imperial fleet will have a few Imperial-class Star Destroyers along for the ride.
Beyond that, this is a fairly straightforward fight; they'll come, you'll beat them, you win the mission. If you have a large enough fleet, this shouldn't be a problem; if not, you might have to hold back and wait for them to get closer to Mon Calamari before engaging them.
Mission Twelve: The Final Battle
- Confront the Death Star in a tactical battle that includes Red Squadron. If Red Squadron survives the battle, Luke can destroy the Death Star and win the game.
Soon after defeating the fleet, you'll suffer a large setback, as Alderaan is destroyed by the Death Star. (This is apparently done automatically, but if you have a fleet there, that might force you into a fight.) There's not much you can do about, so say goodbye to Bail Organa. The Death Star will then likely immediately head for Kuat and blow it up as well. For us, at least, it paused at Kuat long enough for us to get the mission update listed above before continuing on its path to the south along the trade routes.
You can't destroy it, initially, making for some annoyingly unskippable battles as it attacks your systems with space stations in orbit around them. Instead, bring your entire fleet up to Kessel and wait there until Mon Mothma talks about "our valiant pilots" and notes the reappearance of Han Solo. At this point, both Han Solo and Red Squadron will appear at Yavin IV. Bring them into your fleet at Kessel, or wherever it is, and set off after the Death Star. Red Squadron has to be in your fleet in order to destroy the Death Star; if you engage it without that particular unit, you can still "win" the space battles, but it will always destroy the planets underneath regardless. Note that if you attack the Death Star at a system it's already blown up, it will automatically spawn a level-five space station and a small fleet, even though it appears all by itself on the galactic map.
Anyway, the whole event is somewhat anticlimactic in the end: all you need to do to destroy the Death Star is win a tactical battle at the system it's at while Red Squadron is in your fleet. If you have a 200-unit size fleet, then your victory is all but assured; just attack the Death Star at a system it's just destroyed, keep Red Squadron away from all of the enemies, and keep bringing in Mon Calamari Star Cruisers until you've destroyed the enemy space station and all of the ships. The Death Star, oddly enough, isn't accompanied by a large fleet, so you won't have to destroy a billion Star Destroyers to blow it up. (But then again, Tarkin is pretty cocky in general, so supposedly he didn't see the need.) When you win a fight around the Death Star, and Red Squadron survives, then the Death Star will automatically be destroyed, and you win the game. Hooray!
Imperial Campaign
The Galactic Empire campaign in Empire At War is pretty fun, although it's not overwhelmingly challenging, at least on the medium difficult. Although your units are generally more expensive than those of the Alliance, you're going to have lots and lots of cash to spend, so you should be able to build up extensive fleets and armies with which to crush your foes.
Some tips to keep in mind when you play as the Empire:
1: Be careful not to leave important planets undefended; you'll want to have a small garrison at all your important planets to ensure that the Rebels can't sneak a small group of units past your fleet and land on the planet. If they do so when you don't have any units there, you may wind up losing the planet despite having a massive fleet in orbit around it. When you reach the tech level that allows you to build defensive shields and Turbolasers on your planet, you should be able to ease off the garrison manning a bit. Keep in mind that the Rebellion won't attempt to penetrate too far into your territory, so just keep the planets within one jump of any Rebel-controlled planets defended. Planets in the hinterlands can be left empty without repercussion.
2: If you're coming to the Empire after playing as the Rebels, you may get confused by the lack of TIE Fighters and Bombers in the build queue. No need to worry; these units are built into your capital ships, and will automatically disembark when you enter a space battle.
3: Use Vader as best you can. He's immensely powerful on the ground, almost to the point of invulnerability, but he can still be taken out if you let him get overwhelmed or if he gets too close to enemy artillery. In space, he's one of the best anti-fighter units around, and he can heal himself by bringing back more wingmen when they get destroyed. He can still be killed if you make him take on a frigate or something foolish like that, though, so be careful when using him. Don't worry too much if he gets taken out; he'll slowly regenerate over time and respawn within a couple of galactic days.
So, without further ado, let's get cracking...
Prelude: Thyferra
Objectives
- Slay the Rebel scum and burn their buildings to the ground.
- Lord Vader must survive.
- Destroy the communications array.
- Destroy the Rebel Power Generator.
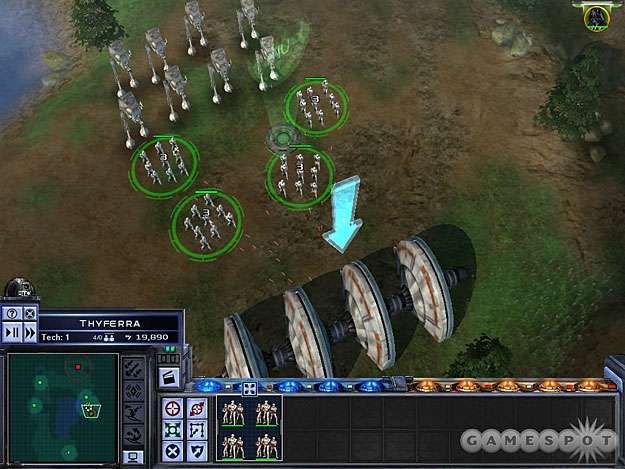
Nothing too severe here. Get used to putting Vader into a squad of his own (by selecting him and pressing CTRL-1, you'll be able to immediately jump to him by pressing 1 again at any time afterwards). Do the same to make groups of your AT-STs and Stormtroopers, then start proceeding to the north. As we mentioned before, Vader is almost unkillable here, so keep him in front of your army to draw the enemy fire while your other troops follow up and kill off anyone that they see. Be cautious of anti-infantry turrets, though; they won't do much to Vader or your AT-STs, but they can rip through your stormtroopers.
After destroying the communications array, sweep to the east, avoiding the shield to the north, and destroy the forces that prevent you from gaining access to the power generator. When it goes down, you'll get a huge amount of reinforcements, far more than you'll actually need to destroy the rest of the buildings. Lead with Vader and your armored troops to take out the anti-infantry turrets, then move your forces in en masse and destroy the buildings to win the map.
Mission One: Crush. Kill. Destroy.
Objectives
- Build a ground assault force and recapture Fondor.
- The local humans are allied with our enemies. Destroying them and their structures will go a long way toward helping our cause.
- Destroy all Rebellion land forces and structures to win.
Before you head out to Fondor, start working on building up the rest of the planets under your control. You'll probably want all of them to have barracks and light factories, at the least, but when you have extra space, feel free to load them up with mining facilities. You can always sell them later when more buildings are available to you. Coruscant, especially, will be an important galactic hub for you, so keep it well defended with a strong garrison. Build an officer academy on its surface and use it to make at least one fleet officer and one field officer. They'll be handy to have during battles.
When you're ready to attack Fondor, build up a stack of units, with Vader in the lead, and land them on the surface of the planet. (Be sure to have at least one Acclamator in orbit, though; you'll find the bombing runs they're capable of to be quite handy.) Bring down Vader first and let him capture the two build pads near your starting point. The initial danger here is from the respawning infantry from the rebellious building nearby, so you'll probably want to build one anti-infantry turret and one repair station for your mechanized units. If you're planning on performing bombing runs, you may want to just wait for one to become available, then send a scout trooper bike down to the first pair of building and bomb both of them to smithereens. Alternately, you can just fill up the rest of your slots with TIE Maulers; they'll be handy here because there are so many infantry squads in your way.
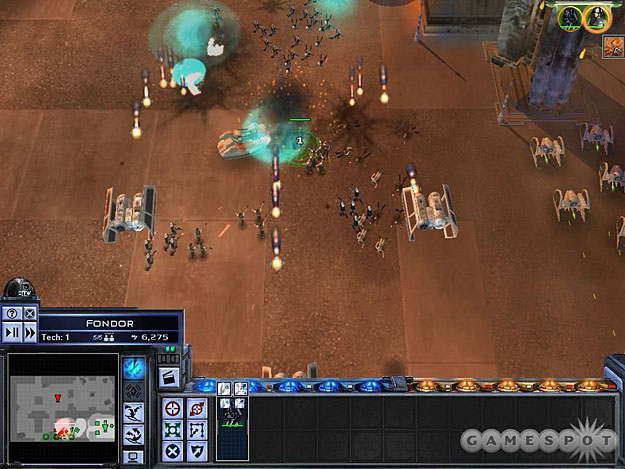
When you reach the westmost spawn point for the rebels, send Vader north to capture the northern reinforcement point. With that in hand, you'll be able to bring down a sizable army. (There's nothing you really need to worry about in the passageway to the west, so you can avoid it if you wish; just be sure to destroy all of the spawning points.) It's best to just bring down as many Maulers as you can; their speed and firepower will overrun any infantry in your way, and in large enough groups they can take down the anti-vehicle turrets that you'll be seeing with minimal losses. With a large group of them, sweep to the east, destroy the Rebel buildings, and you'll win the map.
Mission Two: The Pirate Menace
Objectives
- Build a probe droid and send it to Ilum.
- Build a fleet and escort Boba Fett to Ilum.
- Destroy all the pirate sensor pods.
- Boba Fett must survive.
- Bring in reinforcements and destroy the pirate space station to flush out their leader.
- Attack the pirate leader until he submits. Do not let him escape.
Feel free to take your time with building the probe droid; they're easy to build, but you may want to finish building space stations at your other planets before sending the droid to Ilum. When you do probe the system, you'll reveal pirate forces, and you'll automatically contact Boba Fett to help you destroy the defenses so that the larger Imperial fleet can attack the space station there. Build up a force consisting of at least three Acclamators and four Tartan Patrol Cruisers before attacking the system if you want to have a full suite of ships in the battle. It'll be overkill, but hey - use 'em if you got em. Don't forget to put a Fleet Commander up there, as well.
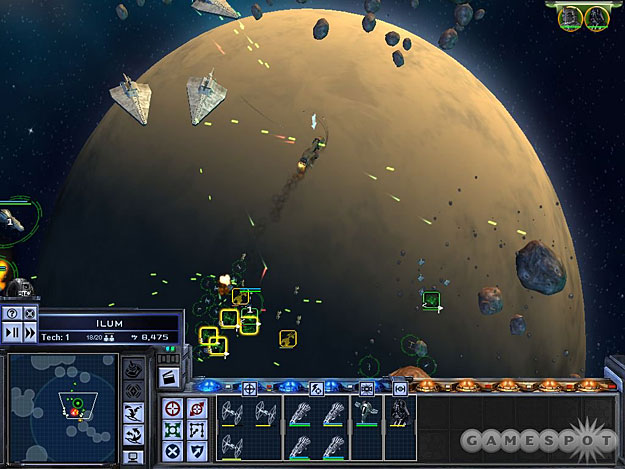
When you reach Ilum, you'll have to use Boba Fett to destroy a number of sensor pods on the perimeter of the pirate space station. To do so, just attack them; when the ships come out to engage you, drop your seismic charge and take them out. This is kind of similar to a Scout Trooper's detonator attack; you'll drop it in the spot where you are, so try to wait until they're flying at you and drop it so that they pass right over it as it blows up. Even if you don't take them out, you should be able to finish them off with Slave 1 without too many problems.
When all of the pods have been destroyed, bring in as many ships as you need to max out your population numbers, then start the assault on the space station. Group together Boba Fett, the TIE Fighters, and your Tartans into one large anti-fighter group, while your TIE Bombers and Acclamators form their own groups. The Acclamators can take down any larger ships in the area, while the Bombers would be best suited towards making an attack on the space station and knocking out the hangar on it, to prevent it from launching more ships. With the combined might of your fleet, you should be able to destroy the base without taking significant losses.
The pirate leader will pop out of the base when you destroy it and make a run for the edge of the asteroid field. You need to take him down before he can jump, so ignore the fighters and concentrate all your firepower on his ship.
Mission Three: Subjugating Geonosis
Objectives
- Build a fleet and escort Darth Vader to Geonosis.
- Space Battle: Quash the Rebel space station.
- Lord Vader must survive.
- Land Battle: Destroy any Geonosian structures you see for a bonus.
- Destroy all Rebellion land forces and structures to win.
Galactic Map
Immediately after you win the battle for Ilum, land troops to conquer the planet and start building it up. It'll be a backwater for the moment, so feel free to load it up with mining facilities.
Now that the previous quest is over, you'll have the opportunity to expand your empire a bit. Taris, Bestine, and Corulag are all controlled by pirates, while Endor and Byss are seemingly empty. (You'll want to check them out with Probe Droids before sending forces out, however.) You can quickly take over Byss by landing troops on it, but Endor will be off-limits until you get through Corulag and Bestine. The pirates are much less likely to make aggressive movements against underdefended systems, though, so feel free to build up a huge army and leave nearby systems undefended while you amass your troops. You can gain a large amount of cash by opening up the trade route between Coruscant and Endor, so that should probably be your first priority. Capturing Bestine will also be helpful due to the fact that it'll knock 20% off of your Acclamator production costs. Note that Eriadu is a short jump away from Coruscant, though; keep it well defended, or the Rebels will take it over when you're not looking.
While routing the pirates, note that the rebel base at Sullust will be able to reach either Bestine or Corulag in one jump; you'll need to keep both planets garrisoned while working your way down the chain of trade routes, and you'll want to have small fleets in the air to back up your space stations as well. When you've eliminated all of the pirate bases, though, you'll be able to focus on taking down the Rebels. Start with Sullust, obviously. Bind your fleets and armies at Bestine and Corulag into two large groups, go in with the fleet first, then follow up with the army to take the planet itself. After building up a space station, you'll be much better able to defend your space against the rebels, since they'll only be able to attack you via Sullust or Coruscant, both of which should be well defended indeed.
Space Battle
If you can build up a big enough fleet and army, you should be able to sweep through most of their systems without much resistance. The Rebels will usually have one large space fleet; they may even attack you with it at some point. If you can whittle it down, then you may see other large fleets around, but these are smaller than they seem; the Rebels seem to keep a lot of ground units in space, so if you attack with a large force, you'll find that you'll often be taking on a couple of Corellian Corvettes and two dozen transports, so you should be able to auto-resolve your way through most of the Rebel-controlled systems here. Keep moving forward until you reach Geonosis, then bring Vader in and take the skies. You may have a tough fight here - be especially wary of the missile-launching ship that you'll encounter as you make your way to the space station - but if you bring in a large enough fleet, you should be able to overwhelm the defenders and take down the space station.
Land Battle
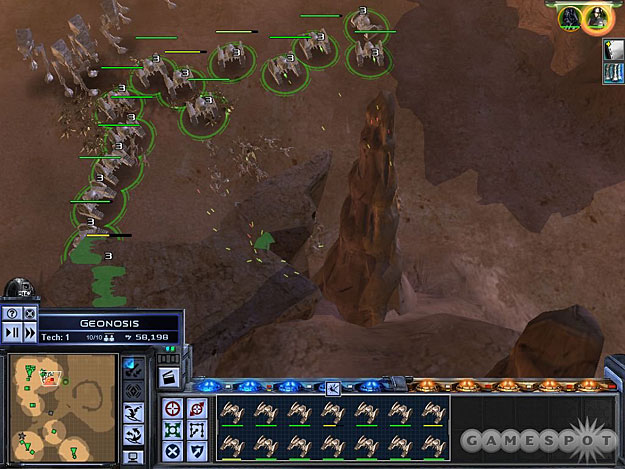
After landing your troops, go ahead and bring down a bunch of TIE Maulers, as well as Darth Vader, of course. The Geonosians have seemingly gone over to the side of the Rebellion, so you'll have to...convince them of the error of their ways. Use Vader to scout out the nearby structures and have your armor destroy them while Vader fends off the incoming infantry units; when that's done, head west to the deployment spot and capture it to bring down more troops.
This battle is pretty similar to the battle on Fondor, but the Geonosians seem to be pretty weak in combat, so don't hesitate to crush them with your Maulers. Their structures are also fairly weak, so sweep to the east to grab that first deploy point, then head north to grab the second. With an army ten units strong, you should be able to amass a sizable force. For a speedy victory, load up on Maulers, and build numerous repair stations when you find build pads. If you rush into battle, you can safely retreat when they start taking damage.
Take out the structures on the small hill first when you start attacking the Rebel encampment. When they've been destroyed, sweep around to the north to put the torch to any remaining buildings and polish off the map.
Mission Four: Attack on Mon Calamari
Objectives
- Take Control of Mon Calamari space.
- Space Battle: Crush the Rebel scum and their Space Station.
- Eliminate all Mon Calamari capital ships.
Galactic Map
After your trip to Geonosis, your tech level will be bumped up a bit, allowing you to build level three Space Stations, Victory-Class Star Destroyers, and Shield Generators, as well as sundry other items, such as artillery units and 2-M Repulsor Tanks. Go ahead and upgrade your valuable planets, keeping in mind that Coruscant and Geonosis are going to be on the frontlines here. Actually, if you immediately attack Kuat, you should be able to take it over without too much of a hassle, allowing you to use it as your frontline planet in the eastern part of the galaxy.
After taking Kuat, you'll probably want to work your way into Ryloth and Nal Hutta before dealing with Kessel; it and Korriban are both controlled by pirates, so the Rebels won't really be threatening you from that direction. After all the available planets are under your control, amass your forces and head to Mon Calamari.
Space Battle
When you enter Mon Calamari space, you'll have a lengthy flight to reach the space station. Keep your Broadside Cruisers to the rear and use them to fire away at distant enemies; they can do a number on enemy capital ships, or the shields of the space station, depending on your preference. If you manage to get your troops in close to the station, try setting up your bombers for a bombing run on its hangar.
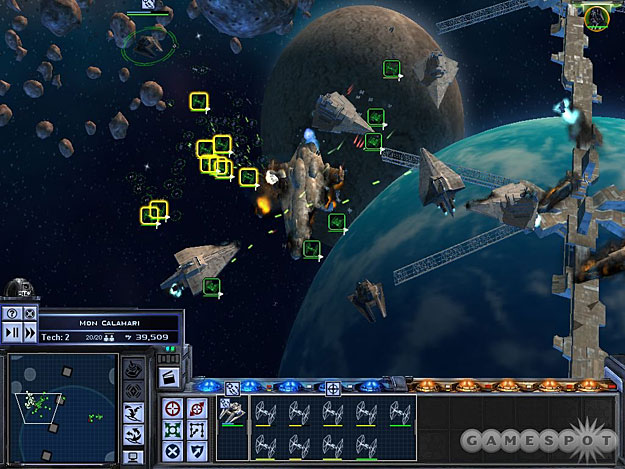
Shortly after you engage the space station, you'll be surprised to see two Mon Calamari Star Cruisers warp into the system. They'll be way back towards the edge of the screen, near where you first warped in yourself, so they shouldn't be an immediate threat to your forces, although they'll likely destroy your Broadsides if they didn't move overmuch. Don't worry about them immediately; continue your efforts against the space station until it's destroyed, since you don't want to be fighting a battle on two fronts.
When the station is down for the count, you'll likely not have to worry too much about any more enemy fighters, so feel free to send your Tartan Cruisers at the Star Cruisers in a suicide run, and use the population room to bring in more Victories and Acclamators. There's nothing particularly mysterious about taking down the Star Cruisers; they're more powerful than any of the ships that you have, but there are only two of them, whereas you should be able to bring in almost as many ships as you need to take them down. That's pretty much what you'll have to do, so just keep shuffling in reinforcements as your ships get destroyed, and concentrate all your firepower on one of the ships until it goes down, before moving on to the next.
When both Mon Calamari Cruisers are destroyed, you'll take control of the planet and its resources. No immediate upgrade in technology is evident, but hey - now you have your own race of fish people to lord over.
Mission Five: Trouble on Kashyyyk
Objectives
- Stop the Wookiee uprising on Kashyyyk.
- Planet Battle: Protect the Imperial prisons.
- Stop Han Solo from freeing the Wookiees.
When you bring your forces to Kashyyyk, your goal will be to find and stop Han Solo before he can destroy all of the Imperial prisons on the surface of the planet. If you act quickly, you should be able to achieve your goal within a matter of minutes. Be sure to have a fleet in place above the planet for bombing runs before you land.
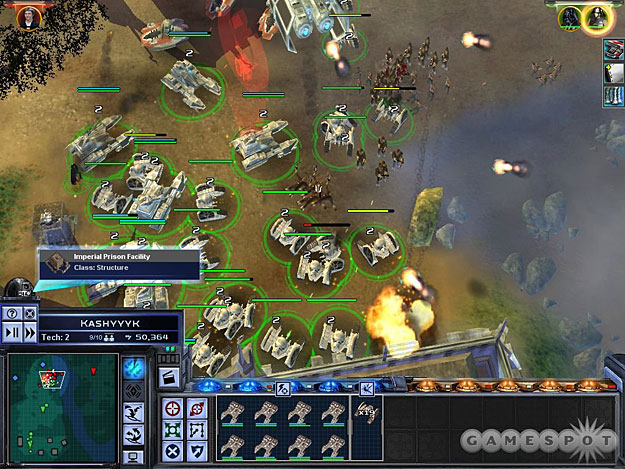
After you start the mission, you'll find that you have enough room to bring down plenty of reinforcements; there's a population cap of 10 units here, so go ahead and swarm the ground with an army of mechanized creations. TIE Maulers are speedy and will make quick work of the Wookiees that you'll be encountering; 2-M Repulsor Tanks will make good teammates for the TIEs, due to their shielding and ability to quickly take down the T-2Bs that the Rebels will be throwing at you. Make one huge group of these units and one for Vader, as well, and that should be about all you need.
There are four or five prisons on the planet, but Han will probably take out two of them before you can move too far from your initial landing zone. After they've been blown, though, he'll seemingly always cross the river in the middle of the map at its northernmost edge, and start attacking the prison there. If you mass your troops near the prison there, you'll be able to intercept the army of Wookiees as they cross over. Shortly afterwards, Han should make his appearance and head towards the prison. His little EMP blast will disable most of your forces, but Vader should be able to wander over to him and start chopping away regardless. What's better is the fact that you should have a bombing run available by the time he approaches this prison, and dropping a bomb on him from above is pretty much a surefire way to kill him.
You don't have to protect all of the prisons here, obviously. Han is your primary target; when you drop a bomb on him or kill him by any other means, he'll retreat into the woods and the mission will be over. You should outnumber him greatly, so even if your bombing run misses the target, you should still be able to pin him down with Maulers (after his EMP burst gets used) and finish him off.
Mission Six: A New Weapon Of War
Objectives
- Escort Veers to Carida and help him test out the AT-AT Prototype.
Now it's time to have a little fun with your new toys! General Veers is on board to help show off the AT-AT prototype, and although you're not going to immediately get to build a huge number of the mechanical monstrosities to aid your ground forces, you'll still have the pleasure of taking on a few helpless targets with the terrible towers of titanic...toughness. Yeah.
Anyway, get Veers to Carida, and the land battle will automatically begin. Your first task will be to use the AT-AT to destroy a few unmanned vehicles that are scattered around the battlefield. They offer no resistance, so this should just be a matter of clicking on them. Tough, huh? When you're ready to move on, move towards the flashing beacon. (You can use the time speed-up button to speed things up a bit if you're annoyed by the slow movement rate of the AT-AT.)
As you move along, you'll have to take down a squad of prisoners; use the Deploy Stormtroopers command to reinforce your Field Commanders. The AT-AT isn't very good at hitting small targets like soldiers, so you'll need the help to take them out.
As you move towards the easternmost island here, Rebels will land and begin assaulting the entire map. With your AT-AT, and the Stormtroopers that you can continually drop, you should be able to easily overwhelm them, but the main problem that arises will be one of scale; when the Rebel repulsor tanks get too close to your AT-AT, it'll be unable to fire on them. You'll have to walk it away from them (using the time adjustor to speed up the process), then pivot it around and wipe them out. Most of the enemy vehicles won't be able to stand up to your AT-AT's fire, so just blast them. On the build pads near your bunkers, try building either Bacta Tanks to let your Stormtroopers and Field Commanders to heal themselves, or anti-Vehicle turrets to wipe out any vehicles that your AT-AT isn't in position to hit.
When you've destroyed all of the Rebel forces, the mission will end. Now it's time to find out where the attack originated from, and wipe out the Rebel scum.
Mission Seven: The Rebel Fortress
Objectives
- Take Control of Jabiim.
Well, that didn't take long: you quickly establish that Jabiim is the epicenter of the new dystopia. As soon as you wrap things up on Carida, you'll find that the Rebel infestation becomes well known on a number of worlds around its location, so you'll have to move quickly to build up your garrisons on those planets and establish fleet presences in the skies to prevent any attacks. You do have the ability to build level four space stations, though, so quickly build them on all of your northern bases to further boost your defensive capabilities. As noted, you can't build AT-ATs yet, but you will have General Veers to add to your main ground-attack army.
You're going to have plenty of planets to conquer before you head out to Jabiim, though. You may face an attack at Carida immediately, so be ready for it; otherwise, the Alliance may build up their forces and assault you at Korriban. Be sure both of those planets are defended. It's best to keep a small fleet at Korriban to protect it, while building up a larger fleet to the west and attacking from the direction of Anaxes. You should have an almost incredible amount of money coming your way by this point, so materiel shouldn't be a problem; if worst comes to worst, just build huge fleets and auto-resolve your way through the fights.
After you've cleaned out the infestation in the east, leaving only Yavin IV (hmm...wonder if it'll pop up later in the game?), get ready for your assault on Jabiim. Take note of the planet's conditions: no repulsorlift vehicles will work here, so your 2-M Repulsor Tanks and your Scout Troopers won't be capable of deploying to the surface.
Space Battle
Once you have the available planets under your control, you'll be able to build up your fleet at leisure, so there's no excuse for losing this battle; just bring a huge stack of ships to Jabiim and rout the Rebels posthaste. They will likely have an Ion Cannon on the surface that'll pound your capital ships, but there's nothing you can do about it except take the blows. Just be sure to move your flagship (whichever ship has your fleet commanders in it) a bit to the rear, behind your other capital ships to prevent it from getting destroyed.
Land Battle
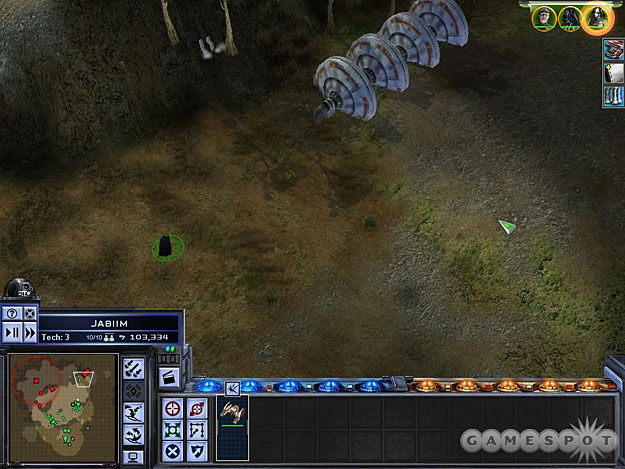
The land battle here can be somewhat frustrating, even if your victory is almost inevitable. You won't have any scout speeders to line up your bombing runs, and there are going to be huge hordes of infantry enemies spamming your location at the beginning of the fight, due to the infinitely-spawning houses scattered around the area. To defend your location, drop a couple squads worth of SPMA-T artillery units and have them deploy immediately. If you drop Veers down as well, his line of sight will be enough to let your artillery kill any infantry that happen to get close to your location.
While that's going on, use Vader and some TIE Maulers to move out onto the build pads near the metallic area of the map, and make anti-infantry turrets where possible. When things have stabilized a bit, use a mixed group of Maulers and AT-STs to hunt down and destroy any human dwellings in the area to prevent them from spawning.
The power generator for the Rebels is located in the northeastern corner of the map, far afield of their shield radius. It should be lightly defended, so roll in with your troops and destroy it before sweeping into the base. The enemy's Light Factory is near the center of the map, and the whole central area of the map is littered with turrets, so use either Veers or your SPMA's to clear the area before sweeping through and destroying the structures for the win.
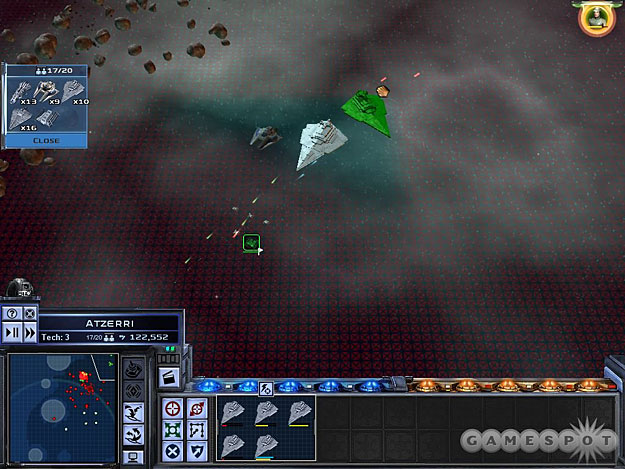
Mission Eight: The Traitorous Moff
Objectives
- Locate and defeat Moff Kalast.
- Space Battle: Destroy all Rebel ships and space stations.
- Find and defeat Moff Kalast.
Moff Kalast is apparently responsible for giving over the Imperial secrets to the Rebellion - it's time to make him pay. He's located down at Atzerri, near Bestine and Bespin, but he has a rather sizable fleet to work with, so you probably won't want to just march in and attack him. Build up your own fleet while parking them at Bestine, and be sure that the neighboring systems all have garrisons; Kalast can and will land small groups of troops, bypassing your fleets, if you leave them undefended.
Space Battle
When you reach Atzerri, you'll find an unpleasant surprise: Kalast is in possession of an Imperial Star Destroyer. Luckily for you, he'll jump out of the system as soon as the battle begins, leaving his Rebel allies to be slaughtered. Yup, sounds like an Imperial officer to us...
Anyway, when you begin your fight, you're going to find that there are plenty of ships to destroy. You can expect around 25 Corellian Corvettes and/or Gunship, five Nebulon-B Frigates, 10 missile ships, and a host of X-wing and Y-wing squadrons; they won't all appear at once, of course, but will continually regenerate any ships that are lost.
Unfortunately, there's a huge asteroid field between your starting position and the enemy space station. If you don't want your capital ships to take damage, you'll have to kind of scoot around to the south and do an end-around to bypass the asteroids. This can take a while, and at least one of your capital ships will get tagged by the Ion Cannon on the surface and get left behind. You can try to charge through the asteroids, if you wish, but you'll be damaged, as mentioned.
When you're in position to the south of the space station, it might be worth your while to concentrate your firepower on the space station's hangar bay; otherwise, it'll keep spitting out Y-Wings and X-Wings until well into the battle. Other than that, this is pretty much just a brute-force battle; you'll have to continually summon in Acclamators and Victories to wear down the huge number of Corellian ships that the rebels put up against you. If you want to launch a little surprise attack, scout out the northeastern corner of the map, near where the Rebel shuttles are likely going to hide. There's a small section of the map that's available for reinforcements, if you can get your eyes on it (or ping it with a TIE Scout). Sending a Victory into the rear of the enemy forces will help draw their fire away from the main portion of your fleet, and will likely let you take out a couple of their missile ships before they have a chance to react.
Galactic Map
When you finish off the Rebels, send troops down to pacify Azterri and take it over. Moff Kalast will have headed straight for Coruscant, surprisingly enough, and will bring a small Rebel fleet with him. (His choice of system may shift if you have ships in orbit around Coruscant.) To counteract his hyperspacical ways, though, you'll be provided with an Inderdictor Cruiser. Add it to your fleet and attack!
During your combat with Moff Kalast, use the Interdictor's ability to generate a gravity well; this will prevent Kalast's ISD from jumping into hyperspace. Of course, you'll have to protect your Interdictor during this combat; if it gets destroyed, there won't be anything to prevent Kalast from blasting his way out of Dodge. As soon as combat starts, activate the gravity well, then move your other capital ships forward a bit to ensure that they're in front of the Interdictor.
From there, this is a pretty straightforward combat. The ISD obviously has more firepower than any of your ships, but you're going to win when you knock its health down low enough, so the rest of the Rebel forces don't really matter all that much. Focus your firepower on Kalast, get his shields low, then go to work on his systems until you finally win the battle.
Mission Nine: An Engagement With The Emperor
Objectives
- Escort the Emperor to Bothawui and help him show the Bothans the error of their ways.
- Planetary Battle: Emperor Palpatine must survive.
- Destroy all of the Bothans and their structures.
Well, now that you know who's been leaking information to the Rebellion, the Emperor uncharacteristically decides to take matters into his own hands, and heads to Bothawui to deal with the Bothans personally. There's no need to build up a huge land force here; the Emperor will head down to the planet alone. Be sure to have some space units in orbit before sending him down.
When you hit the planet surface, you should find yourself engaged in something of a cakewalk. The Emperor is probably even harder for the enemies to kill than Vader is, mostly thanks to his passive ability to steal health from nearby infantry and add it to his own; as soon as he gets hit, he should be able to immediately regenerate his health. So, yeah, three cheers for god mode!
Anyway, your goal here is to destroy the buildings that will continually spit out Bothans. You can fool around with the Emperor's powers to either kill the Bothans, or convert them to your side, but all you really need to do is task him on a building and let him go crazy. It'll take him a while to destroy the buildings, so you may want to flip on the doubletime toggle to speed things up. As mentioned, he essentially can't die here, so there's no need to really protect him.
You don't need to take out every building in the area; after finishing off half of them or so, you'll automatically end the mission. You may encounter a small space battle after the mission ends, though; thus our warning about including space units on the planet before attempting the ground mission.
Mission Ten: Capturing A Princess
Objectives
- Build a fleet and escort Vader to Tatooine to capture Princess Leia. You'll need at least one Imperial Star Destroyer to use its tractor beam on her ship.
- Space Battle: Save at least one Interdictor.
- Destroy the Pirates and their space station.
- Lord Vader must survive.
- Hide your fleet in the nebulas.
- Wait until the Princess receives the data transmission.
After some...persuasion, the Bothans revealed to the Emperor that Princess Leia Organa would be arriving in orbit around Tatooine to receive the transmission regarding the technical specifications of the Death Star. You'll have to capture her! Before you head out, though, you'll need to have at least one Imperial Star Destroyer in your fleet. You can build them at Sullust, Fondor, Kuat, and Mon Calamari, so start cranking out a few of them to add to your forces. You can also build fifth-level space stations, as well as Heavy Factories for the production of AT-AT's and AT-AA's.
Take a little time to upgrade your planets and get a few Star Destroyers. You won't be facing any attacks from Tatooine, so feel free to switch on the sped-up time toggle to build everything more quickly. You'll also want to make sure that you have some Interdictors in your fleet before you attack at Tatooine.
Space Battle
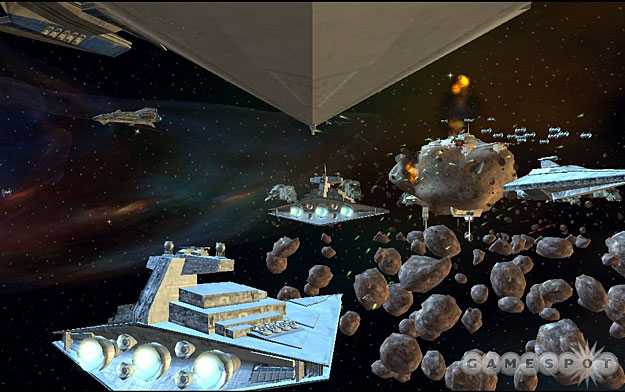
When you arrive at Tatooine, you'll have to take out a fleet of space pirates that have entered the system. Nothing especially difficult here, just a few frigates. They'll be attacking some of your Interdictors that were apparently in the system without an escort; just quickly move them behind your capital ships, and you should be able to destroy the pirates without much difficulty. When you attack the space station, though, you may want to keep your ISD behind the front lines; if the enemies lock onto it and attack it, you may lose the launch bay, or even the tractor beam, which would be a Bad Thing.
After the space station and the nearby frigates are destroyed, you'll have to move your fleet into the nebulas scattered around the map to avoid detection by the incoming Rebels. You'll be able to tell when you're hidden by looking at your ships; they'll appear translucent instead of solid. Be sure to move your Interdictors over to where your Star Destroyer is hiding; they'll be the first thing the Rebels will attack, so you'll need to protect them well.
After the X-Wings jump into the system, wait for Tantive IV to appear as well; this is the ship that the Princess is on. You'll have to stay in the nebula until she receives the transmission; only then will you be clear to leave the nebula and engage! You'll have to move incredibly quickly, and get your Interdictors out of the nebulas so that they can engage their interdiction fields; you only have around ten seconds to move them and activate the fields. Any longer, and your precious prey will warp away and avoid capture.

So far as Tantive IV goes, it'll be tough to capture, due to the fact that it's quicker than your Star Destroyers. If you can keep enemy ships off of your Interdictors, or if you have more Interdictors waiting to deploy, then you should be able to just make a suicide run towards the Mon Calamari cruiser. After you've cleared enough population space to bring in another Star Destroyer, warp it in directly to where the Tantive IV is and lock it down with your tractor beam. When that's done, you'll automatically win the fight.
Mission Eleven: The Destruction of Alderaan
Objectives
- Escort the Death Star to Alderaan.
Now that the ultimate power in the universe is under your control, it's time to start using your power for the greater good. You're going to start by destroying Alderaan and slaughtering billions of innocents in a fit of pique. Hooray for the Empire!
Space Battle
Although it's difficult to really lose the battle of Alderaan, if you want to have a good time, you're going to want to bring a fleet with at least four Imperial Star Destroyers in it, and use that to escort the Death Star to Alderaan. When you get there, you'll automatically start a space battle.
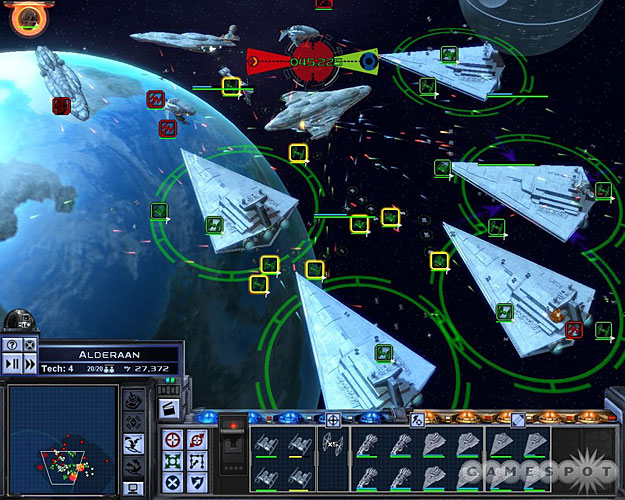
The bad news is that the Death Star can't be controlled by itself; it pretty much just sits there on its own, a passive observer, until it launches its attack with a Tyson-esque rage. In order to destroy Alderaan, though, it needs to be protected; this entails engaging the numerous Mon Calamari Star Destroyers that will engage your fleet. You don't need to win the battle or anything; just stay in the fight until the Death Star is prepared to fire.
What's interesting is that your initial forces apparently don't count towards the 20-unit population cap, so you should be able to immediately bring in a number of new ships, if you wish to. There's nothing quite like pounding Home One with eight capital ships.
Regardless, all you need to do is to not die. Since the Death Star's timer is only 75 seconds long, you should essentially automatically win this battle; once the Death Star destroys Alderaan (you have to flip the switch that appears near your unit bar), you return to the galactic map.
Mission Twelve: End of the Rebellion
Objectives
- Destroy Alzoc III, Polus, Shola, Hoth, and Yavin IV.
The Emperor has tracked down the remnants of the Rebellion to five remaining strongholds. With your massive fleet, you'll have to bring the Death Star to each planet and destroy it, as you did Alderaan. Given the Death Star's painfully slow movement rate, you'll want to spend most of your time here in double-speed mode. Heck, that's probably true even for the space battles - unlike the conflict at Alderaan, you won't automatically win these when the planet blows up; you'll still have to hunt down and destroy all of the Rebel space forces.
And that's...pretty much all you need to do. The Rebels will have a sizable fleet at each of the planets, but they won't have a large number of Mon Calamari Cruisers hanging around; it'll be the usual surfluous number of Corellian Corvettes and Nebulon-B Frigates, for the most part. But if you've been investing your cash wisely, you should be able to build a truly massive fleet, something around 400 or 500 population units large, all in one huge stack. You shouldn't need to, it's just pretty cool to have an unstoppable force of Star Destroyers escorting the Death Star around.
Each of the planets you attack will have an Ion Cannon, as well as a level five space station, so none of these battles will be easy, necessarily (although the Ion Cannon obviously goes away when you blow the planet), but still: you can bring along as large of a fleet as you need to to each of these engagements, so there really shouldn't be anything stopping you from crushing everything in your way. Be sure to garrison the planets near the Rebel strongholds, though, as it'll probably take you over a week of galactic time to get the Death Star to each of the planets. We never got attacked by any of the planets, ourselves, but if you're playing on Hard difficulty, they may decide to resist the inevitable and lash out at your properties, so be ready for it. A set of energy shields and turbolaser cannons, paired with a few artillery units, should make most of your planets impregnable.
When the fifth planet has been destroyed, you'll have finally eliminated all remnants of the Rebellion. Maybe Han and Chewie are still out there somewhere, and maybe the droids are running around on Tatooine, and maybe Luke and Obi-Wan are preparing in secret to restore order to the galaxy, but for now: you win. Hooray evil!
Ground Units
Galactic Empire
2-M Repulsor Tank
Strong Against: T2-B Tank, MPTL-2A, Anti-Infantry Turret
Weak Against: T4-B Tank, Plex Soldier
Like the Rebellion's T2-B tank, the 2-M Repulsor is a hovering vehicle that can move fairly speedily, and packs shields to supplement its armor. It's primarily intended to be an anti-vehicle unit, and fulfills this role quite well, especially when used in large groups, but it can also be decent as a purely defensive unit, solely because its shields can protect it from a decent amount of low-level blaster fire and prevent them from ever taking damage. The computer, especially, seems to be quite fond of infantry units, so you can definitely park some 2-M's in their path to prevent them from moving on. The 2-M is borderline incompetent when firing at infantry, though, so this will result in something of a stalemate unless you roll up some Maulers to finish the job.
AT-AA
Strong Against:
Weak Against: T4-B Tank, MPTL-2A
The AT-AA is your anti-aircraft unit, and one of the most advanced ground units in the game for the Empire. And by "advanced" we mean that it'll take a long time before you can actually research and build it, not that you'll actually be using it all that much. As the name implies, this unit is responsible for shooting down enemy air units; in this case, that means it's capable of taking down Y-Wings as they fly over unprotected ground, as well as Speeder units that are attempting to lasso your AT-ATs. Since AT-AA's are so specialized, they can rip through any air units with relative ease. Even though they can attack ground units, though, they're quite poor at doing so, so they'll be easy pickings for your opponents vehicles if they get into range. They are, however, useful when taking on enemy infantry units, thanks to the splash damage effect of their fire.
AT-AA's are fairly slow, as well, and if you want to fully prevent a bombing run, you'll need to be in the path of the bombers before they start dropping the bombs. If your AT-AT units are right at the epicenter of the bombing run area, they'll still shoot down the Y-Wings, but not before they manage to drop most of their bombs. Unfortunately, since bombing runs can start from any corner of the map, it can be difficult to really place your AT-AA's to prevent bombing runs.
AT-AT
Strong Against: Turrets,
Weak Against: Airspeeder, Plex Soldiers
Special Abilities: Focus Firepower, Deploy Stormtroopers
Ah, the mighty All-Terrain Armored Transport. Although expensive, bulky, and slow, the AT-AT is going to be the mightiest vehicle on any battleground it happens to hit, and are well worth deploying. Using them well will be difficult, but can definitely shift the balance of power.
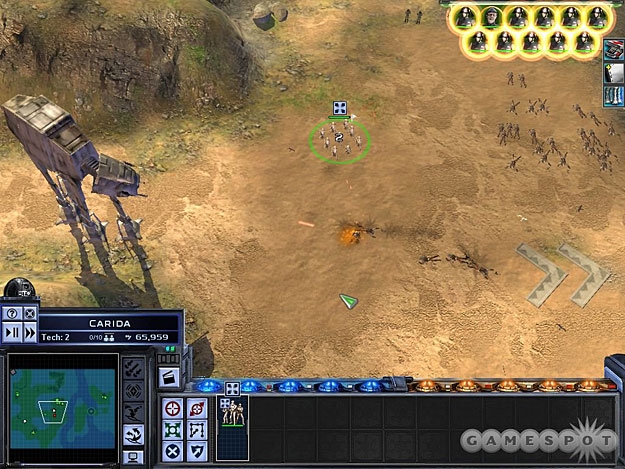
The key things to remember about AT-ATs are, again, that they're quite slow, and that they can't fire at units that get up close and personal. They're also quite poor at dealing with infantry units that they encounter; their laser fire just doesn't really hurt infantry all that much. Given enough time, they can kill a squadron of soldiers, but it'll take a long time, and on planets where the Rebels can generate a large number of friendly units, such as Mon Calamari or Kashyyyk, you can expect them to swamp your AT-ATs with their infantry units. They won't individually do a lot of damage (and if you park your AT-AT by a repair structure, it should be fine), but over time, they'll wear it down. Of course, one of the AT-AT's special abilities is to spit out a small squad of nine Stormtroopers from its belly, precisely to defend it from such threats. You can only spit out two nine-person squads, though, so use them carefully.
The main strength of the AT-AT is that it can fire from a very long range for a vehicle and has exceptional firepower. It doesn't have the same range as artillery units, but it can definitely take out, for example, an anti-vehicle turret from well beyond the turret's effective range. On top of that, its Focus Firepower can actually take its laser fire and turn it into something of an area-of-effect weapon, utterly demolishing anything it's targeting, as well as any nearby units in a straight line from the AT-AT.
The weaknesses of the AT-AT are that it can't pivot very quickly, so if a unit comes up from behind it, it'll be defenseless. They also can't fire at units that are very close to their feet, but then again, they can crush both infantry and light vehicles by walking over them.
AT-ST
Strong Against: Turrets
Weak Against: T2-B Tank, T4-B Tank, Plex Soldiers
The AT-ST is something of a necessary evil for the Empire. While it's not particularly great at killing things, it's a hardy little unit that can take a beating and let your other units get into position for the kill. Unfortunately, their weak firepower makes it difficult for them to contribute much in a fight, especially when dealing with those pesky infantry.
SPMA-T
Strong Against:
Weak Against: T2-B Tank, T4-B Tank, Plex Soldiers
It's artillery! What more can you really say about the SPMA-T. It's the Imperial version of the Rebellion's MPTL-2A, although with a few differences. Like the MPTL, the SPMA is an expensive and very slow-moving vehicle, has to stop and deploy its cannon before it can fire, and is unable to take much damage before it falls apart in a heap of scrap. Luckily, though, when you do deploy the SPMA, it'll be able to fire on enemy units well before they come in range, and will usually finish them off before they manage to get close enough to be a threat, unless they're in a large group; it obviously has more firepower than any other ground unit in the game, so one or two shots is all it'll take before most enemy units go down for the count.
SPMAs are difficult to use offensively, mostly because of their slow movement, but they're an integral part of any good defensive strategy, and when you're attempting to hold a planet from enemy invaders, they're going to be worth their weight in gold, and should be able to kill many attackers. This is especially true when defending from inside a shield generator; you can park your artillery units near the edge of the shield (but not too close, and hopefully with some weaker units between them and the edge), and let them fire on the enemy units as they approach. Since enemy units have to slow down when passing through shields, they'll be sitting ducks for your artillery pieces and should get ripped to shreds.
It appears that SPMA fire is classified as laser, so they will plunk off an non-upgraded energy shield with no effect. This would also seem to make them vulnerable to the accuracy penalty in rain, but we haven't noticed this specifically.
TIE Mauler
Strong Against: Rebel Infantry Weak Against: T2-B Tank, T4-B Tank, Plex Soldiers
The TIE Mauler is the Empire's not-so-elite anti-infantry unit, capable of ripping through flesh and blood lickity split. There's not much to say about it; it's a cheap unit that moves quickly and can be used to ambush incoming troops. It's also one of the few units that's actually capable of running over infantry enemies, allowing you to kill them without even bothering to stop and fire.
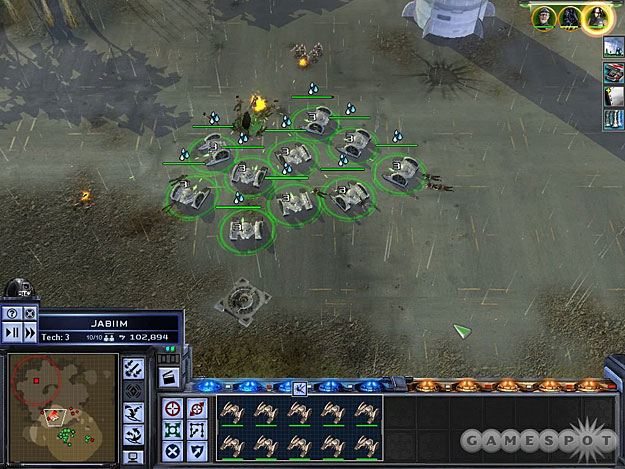
Unfortunately, the Mauler's cheapness and utility against infantry obviously have to be balanced by something, so they possess fairly weak armor, and will fall quickly to sustained fire, especially from enemy vehicles. Still, though, they come five to a squad, so they're an excellent unit to bring down en masse and use in one huge army to overrun enemy positions, especially when playing against the computer. You'll lose plenty of them, but they're cheap enough to easily replace, and they're just plain faster than other units, allowing you to get through battles more quickly than you would if you had to wait for an AT-AT to tromp around.
Stormtrooper
Strong Against: Rebel Infantry
Weak Against: MPTL-2A, Infiltrator
The Empire doesn't really seem to need Stormtroopers as much as the Rebellion does. While Stormtroopers are fine units for the money, especially in a defensive capacity, they're not going to be overly powerful units. When you need to take out Rebel infantry, you're probably going to want to just drop down a squad of TIE Maulers and let them do the dirty work.
One use of Stormtroopers, however, is to position them as makeshift defensive outposts with their Cover ability. They’ll take only a small amount of damage from incoming fire, and the Rebellion has few units capable of really steamrolling infantry. Unless they hit you with artillery or Infantry sniping, your Troopers should be able to hold the line against anything incoming for at least a minute, or until you manage to roll your other units nearby to the rescue. Of course, if your opponent is smart, they'll just ignore your units and run around them...
Scout Trooper
Strong Against: MPTL-2A
Weak Against: T2-B Tank, T4-B Tank
The Scout Trooper is one of the few units for the Empire that can quickly reconnoiter an area. It's not nearly as good as the little scout droids that the Rebels get as a part of their MPTL-2A artillery - in order for the Scout Trooper to spot an area, it'll have to actually, physically go there. Meaning that if you want to use a Scout to line up a bombing run on your opponent's buildings, you'll have to move it back behind their lines and hope that it manages to reach its destination before getting blown up.
Thanks to the speed of their speeders, the Scouts can usually make a trip like this without a problem, but they will take damage from every unit that sees them during their flight, and will usually wind up dying on the return trip, depending on what units are in their way. So they're essentially suicide scouts, in practice, but still, that's all you need them to be most of the time.
If you're interested in using them offensively, Scouts do have the capability to drop small bombs with their special attack. These bombs aren't exceptionally damaging, but they can knock out infantry if you place them close enough. They work best against MPTL-2A artillery units, though, especially since they usually can't move fast enough to get out of range of the bomb radius before it detonates, and seem to take an especially large amount of damage from the bombs.
Rebel Alliance
MPTL-2A Artillery
Strong Against: Turrets, AT-AA, Stormtrooper
Weak Against: 2-M Repulsor, AT-AT, Scout Trooper
The MPTL-2A is the Rebellion's form of long-range artillery. It's mechanically almost identical to the SPMA-T, save for the fact that it fires a rocket barrage instead of lasers. Helpfully enough, though, rocket fire is impacted by sandstorm conditions instead of rain, and since rain is much more prevalent on the worlds of Empire At War, you won't have many problems from the weather.
Another cool little bonus you'll get here are from the inclusion of a pair of sensor droids. These droids can't kill anything on their own, but if you take advantage of their Sensor Ping ability, you'll be able to momentarily get an eye on the enemy base, allowing you to send a bombing run straight down their throats without sacrificing units to scout it out. And that's just plain cool.
T-2B Repulsor Tank
Strong Against: Artillery, Anti-Infantry Turrets
Weak Against: Large vehicles, Anti-Vehicle Turrets
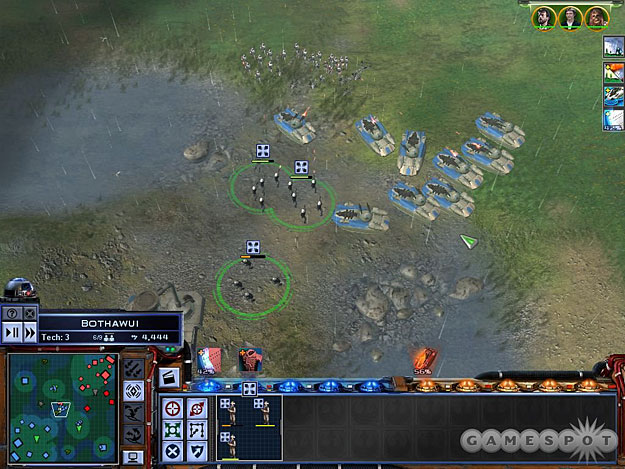
The T-2B isn't quite as effective as the Imperial 2-M Repulsor tank in terms of taking down enemy vehicles, but it is perhaps slightly more effective at killing infantry when attacking en masse. Beyond that, there's not much to say: its shielding will protect it from most fire from infantry units, making it an excellent front-line unit. If you run into anti-vehicle units, you can bring your T-2B's back to the rear to let their shielding recharge before resuming the attack.
T4-B Tank
Strong Against: SPMA-T, AT-ST, TIE Mauler, 2-M Repulsor Tank
Weak Against: AT-AT
The T4-B is the beefiest ground vehicle available to the Rebellion, an adaptable and hearty little tank that can work wonders against most of the Empire's ground forces. Although it's unshielded, it has plenty of hit points to work with, and can also switch between rocket fire and laser fire. Laser fire is what you want to use when you're taking on vehicles, but the rocket fire can be used to cause splash damage on multiple targets, and is pretty helpful when taking on infantry, or when firing at something that's distant and out of reach. The cool thing about the weapon switching is that it's instantaneous, and there's no cooldown time between switches, so if you don't mind a little micromanagement, you can roll your tanks up while firing rockets, then switch them over to lasers when they get close enough to use them.
T-47 Airspeeder
Strong Against: AT-AT
Weak Against: AT-AA
The Airspeeder is perhaps best known to Star Wars fans as the vehicle that harried the ground assault at Hoth by tripping up AT-ATs with tow cables. In Empire At War, they can obviously fulfill this same function, but they're also capable of some amusingly tough-to-counter damage to other enemy units.
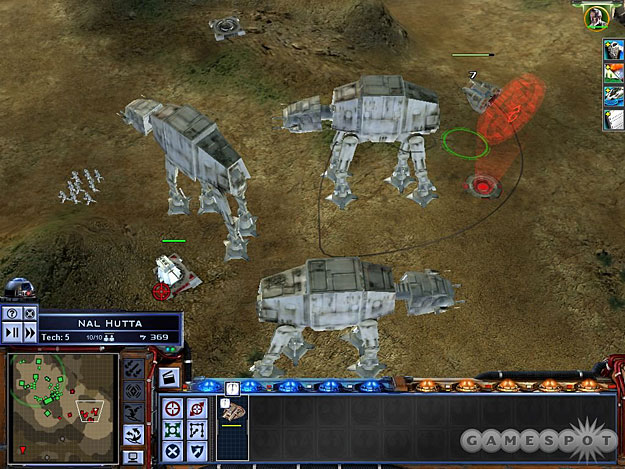
Obviously, though, the Speeders are mostly intended to be used against AT-ATs. Their tow cable attack doesn't always work exceedingly well, and sometimes seems to just fail outright, but it's still obviously the most efficient way to proceed against the mechanical monstrosities, since it is essentially an automatic kill when it comes off.
Against other units, though, Speeders can prove to be an annoying threat. Their lasers don't do a huge amount of damage, but they move quickly and can't be attacked by many ground units, so sometimes you can just send them over to the enemy base and have them launch an attack against their shield generator or factories with little care for their own well-being. If your enemy has an AT-AA or an anti-air turret, then this will be a suicide run, but if they don't, then they'll have a hell of a time bringing the Speeders down.
Infiltrator
Strong Against: Stormtrooper
Weak Against: TIE Mauler
The Infiltrator unit is an elite Rebel ranger, capable of sniping away at enemy infantry or throwing Thermal Detonators onto enemy vehicles to destroy them as well. While it's tough to justify spending one population on such a small number of units (each squad only has two soldiers), they are excellent at sniping away at infantry from a long distance, or running forward to capture reinforcement points or buildpads. They move much more quickly than most units do, but if they get caught by a TIE Mauler, you can kiss them goodbye.
Rebel Infantry
Strong Against: Stormtrooper
Weak Against: Stormtrooper, TIE Mauler
The base infantry unit for the Rebel are their small squads of soldiers. While they're nothing special, they can take a good amount of damage thanks to their Cover ability. They're not going to be killing much of anything by themselves, but they can confuse enemy units while remaining bunkered up or simply standing in their way.
Plex Soldiers
Strong Against: Vehicles
Weak Against: Stormtrooper, TIE Mauler
Only the Rebellion gets Plex Soldiers. When you deploy Plex Soldiers, you'll gain two squads of three rocket-launcher-wielding soldiers apiece. Plex Soldiers are strong against almost any type of vehicle, but have the usual weaknesses of infantry units, so keep them away from TIE Maulers and artillery units if you're at all fond of their continued lives.
Space Units
Galactic Empire
The Empire actually gets a smaller population cap than does the Rebellion during space battle. While the Rebellion gets a 25-unit cap, the Empire is going to have to work with a 20-unit cap. This, of course, is because the Empire doesn't have to build fighters or bombers, like the Rebellion does. Instead, these units are automatically stowed on board the Empire's capital ships and frigates, and are automatically discharged into space at the beginning of a fight. All of the capital ships and frigates have multiple wings stowed away, but won't discharge them all at once; instead, they'll usually spit out one wing of fighters and one wing of bombers, and only replace them when the wings are completely destroyed. Of course, if they run out of wings, or if the hangars on your ships get destroyed, you won't be able to bring in any more fighter wings, at least not until you bring in a whole new capital ship.
Note that, like ship damage, the number of TIEs on board a capital ship is refreshed at the beginning of each battle. If an Imperial Star Destroyer discharges all of its TIE Fighters during one battle, but survives the fight, it'll have all of the fighters again at the start of its next engagement.
Acclamator Cruiser
Strong Against: Corellian Corvette, Marauder Missile Cruiser
Weak Against: Mon Calamari Star Cruiser, Y-Wing, Assault Frigate
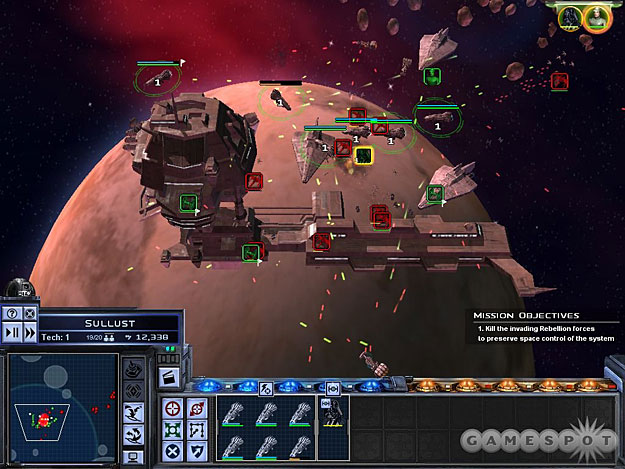
The Acclamator Cruiser is the ground-floor ship for the Empire, kind of a baby Imperial Star Destroyer. It's technically classified as a frigate, but it's fairly bulky for a ship of that class. It packs four TIE Fighter squadrons and two TIE Bomber squadrons. It'll serve you well in the early missions of the game, but gets outclassed later on by the bigger ships.
Broadside-Class Cruiser
Strong Against: X-Wing, Y-Wing, Space Stations
Weak Against: Mon Calamari Cruiser, Assault Frigate, Corellian Gunship
The Broadside-class cruiser is essentially space-bound artillery, capable of firing missiles from an astonishingly long distance. These missiles are slow-moving and not very accurate, but the cumulative effect of their damage can be substantial, especially if they can keep up their firing for a minute or two. As mentioned, they work well against fighters and bombers, but they can damage almost anything given enough time. They're perhaps best used against space stations, which they can be tasked on from a mile away; their missiles will damage multiple systems simultaneously, so the space station won't necessarily be impaired immediately, but when your capital ships finish off the defenders, they'll have a much easier time polishing off the space station as well.
Imperial Star Destroyer
Strong Against: Corellian Corvette, Corellian Gunship, Assault Frigate, Nebulon-B Frigate
Weak Against: Y-Wing Bomber, Mon Calamari Cruiser
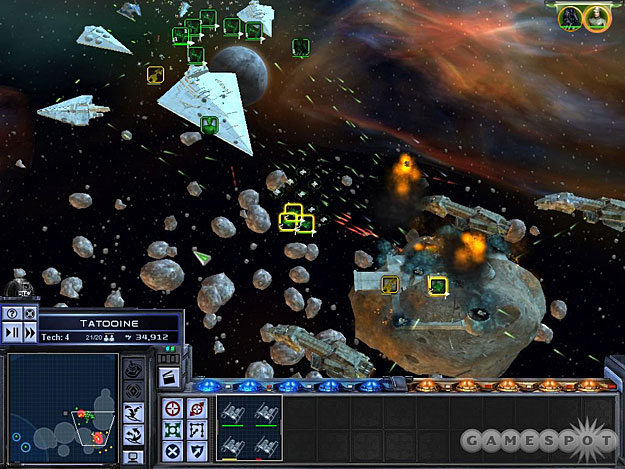
One of the most immediately recognizable ships in all of science fiction, the mighty Imperial Star Destroyer is going to cause massive headaches for your enemies, thanks to its huge number of hardpoints (including four Turbolaser Batteries and two Ion Cannons), and its ability to deploy up to 10 TIE Fighter squads and five TIE Bombers. Its special ability - the tractor beam - isn't anything exceptional, but can be used to lock weaker ships in range and prevent them from getting away from its fire, which is especially useful when trying to lock down smaller Rebel ships, such as Corvettes or Captain Antilles' ship, which will often attempt to rush away from you when they start taking fire.
Interdictor Cruiser
Strong Against: Marauder Missile Cruiser
Weak Against: Everything else
The Interdictor isn't going to be of tremendous use in the singleplayer game, where the computer opponents will generally fight to the death regardless of the hopelessness of the cause. It's also pretty obviously going to be useless in skirmish mode, especially when you consider the cost of the ship. Its main use is to erect an interdiction field, which prevents any ships in the same combat from escaping into hyperspace before the combat is finished. As mentioned, though, computer enemies will rarely attempt to escape, except in specific missions during the campaign, so unless you're playing a multiplayer Galactic Conquest game, you probably won't have too much need for the Interdictor's gravity well.
The other primary ability of the Interdictor is its missile defense. If you activate its missile shield, all incoming missiles (such as from a Broadside cruiser) will be deflected away from the Interdictor. This can be useful in space skirmishes or multiplayer games to protect your space station from long-range threats, but again, you're going to be giving up population room and paying a lot of money for a unit with minimal offensive abilities.
Tartan Patrol Cruiser
Strong Against: X-Wing, Y-Wing, A-Wing
Weak Against: Mon Calamari Cruiser, Assault Frigate, Nebulon-B Frigate
Small, maneuverable, and somewhat essential, the Tartan Patrol Cruiser is the Imperial variant on the Rebel's Corellian Corvette. Armed with multiple laser cannons, these ships can quickly take down enemy fighters and bombers with ease, but will get smashed to bits if they get too close to enemy capital ships.
TIE Bomber
Strong Against: Mon Calamari Cruisers, Assault Frigates
Weak Against: Corellian Corvette, X-Wing, A-Wing, Marauder Cruiser
TIE Bombers are fragile, but necessary ships. Although they don't possess the ion cannon of their Y-Wing counterparts, their torpedoes can still directly damage hardpoints of shielded structures and ships. Massing them together at the beginning of a fight, then having them sweep from behind your ships when the battle is joined, can be a profitable tactic, especially when you can take down the shield generator of a powerful ship or the hangar of a space station. Bombers aren't quite as horrifically important for the Empire as they are for the Rebellion, though, due to the fact that most Mon Calamari Star Cruisers have neither shield generators nor hangars, but they're still useful units, especially when taking on enemy space stations.
TIE Fighter
Strong Against: Z-95 Headhunter, Y-Wing
Weak Against: Corellian Corvette, X-Wing, A-Wing, Marauder Cruiser
TIE Fighters in Empire at War live up to the reputation they've gained in the movies as ships that are incredibly numerous, but not particularly threatening. There are plenty of TIE pilots on any given capital ship, and they're not really all that great at anything, save for engaging enemy fighters and attempting to keep them busy. But they do that well, at least, and since you'll be getting plenty of fighter squadrons from each of your capital ships, you should be able to use the TIEs as a low-level annoyance against your enemy.
TIE Scout
Strong Against: Y-Wings
Weak Against: Corellian Corvette, X-Wing, A-Wing
TIE Scouts are of dubious utility in most space battles. They're not powerful in combat, but they can move fairly quickly. Most of the time, though, you're going to want to use their sensor ping ability to scout out distant corners of the battlefield. This is mostly useful if you have a hypervelocity gun that you want to use on enemy ships, but you can also use it to scout out obscure areas to bring in reinforcements. Sometimes an enemy space station will be far enough from the corner of a battlefield to allow just the smallest possible crack for you to deploy ships into. Pounding an ISD into one of these cracks can let you attack your enemy from two directions and force them to split their defense.
Victory Class Star Destroyer
Strong Against: Corellian Corvette, Corellian Gunship, Marauder Missile Cruiser
Weak Against: Y-Wing, Mon Calamari Star Cruiser
The Victory-Class Star Destroyer is an older model of destroyer, dating back from the days of the Clone War. It's slightly more expensive than the Acclamator class of ships, but although it (like the Acclamator) is classified as a frigate, it's much more capable than its smaller counterpart at taking on larger ships, thanks to its trading the laser cannons of the Acclamator for an Ion Cannon that allows it to quickly drop the shields of enemy vessels. It boasts six TIE Fighter squadrons and three TIE Bomber squadrons. Unfortunately these vessels don't appear to be capable of atmospheric flight, so you won't be able to recreate the infamous Ghorman Massacre.
Rebel Alliance
The Alliance has some interesting units in its armada of space, and is capable of bringing more units to a fight than the Empire is, with a population cap of 25, as opposed to the Empire's 20. Of course, this takes into account the fact that the Alliance is required to build X-Wings and Y-Wings and use them as separate units in fights, wheras the Empire gets "free" TIE Bombers and Fighters that are built into their capital ships.
Alliance ships are also usually a bit more defensive in nature than their Imperial counterparts. Where many Imperial ships get the ability to overpower their weapons at the expense of their shields, Alliance ships often get a shield-recharge ability that can be used when they're on the brink of having their shields drop. It'll prevent them from doing much damage, but can quickly restore them to fine fettle relatively quickly.
Assault Frigate Mk II
Strong Against: Tartan Patrol Cruiser, Broadside Cruiser, Acclamator Cruiser
Weak Against: Imperial Star Destroyer, TIE Bomber
The Rebellion's strongest ship besides the Mon Calamari Star Cruiser is the Assault Frigate. While it won't win any fights with an Imperial Star Destroyer, its armament makes it a near-match for a Victory, and it will of course overpower smaller vessels without too many problems. It even packs a pair of laser cannons to deal with incoming fighters and bombers.
A-Wing
Strong Against: TIE Bomber, TIE Fighter, TIE Scout
Weak Against: Tartan Cruiser
The A-Wing is a fighter craft that's something of an upgrade over the earlier X-Wing, even if they cost the same. It's quicker and more nimble than its predescessor, and is capable of taking down TIEs like nobody's business. The main difference between it and the X-Wing is its lack of s-foils, which allow the X-Wing to occasionally greatly outrun it.
Corellian Corvette
Strong Against: TIE Bomber, TIE Fighter, TIE Scout
Weak Against: Imperial Star Destroyer, Victory Star Destroyer, Acclamator Cruiser
This relatively old style of ship is still quite powerful at the time of the Rebellion, especially when taking on incoming TIEs. Its eight laser cannons aren't going to make a dent against capital ships, but it can chew through fighters and bombers like a knife through butter. Although technically a knife doesn't "chew"...
Corellian Gunship
Strong Against: Tartan Patrol Cruiser, Broadside Cruiser
Weak Against: Imperial Star Destroyer, Victory Star Destroyer
This anti-ship version of the Corellian Corvettes trades in most of the laser cannon in favor of missile launchers, allowing it to penetrate shields and directly damage ships or their hardpoints. It's an interesting design, but the missile design isn't necessarily useful unless you use it in a large group, especially since it can only really be effective against a couple of ships. You can try to use it against a capital ship, sure, but the missiles aren't really as powerful as those of a Y-Wing, and you'll be more vulnerable to turbolaser fire, so you may want to pick a ship that's a bit more specialized than the Gunship when deciding what to buy.
Marauder Missile Cruiser
Strong Against: TIE Fighter, TIE Bomber, Space Stations
Weak Against: Imperial Star Destroyer, Victory Star Destroyer, Acclamator Cruiser, Interdictor Cruiser
Like the Broadside cruiser, the Marauder fires long-range missiles that can bypass shields and will make quick work of any fighters or bombers that get caught nearby. They also work well against space stations, but you have to be careful, as the Marauder is only lightly armored.
Mon Calamari Cruiser
Strong Against: Imperial Star Destroyer, Victory Star Destroyer, Acclamator Cruiser, Tartan Patrol Cruiser, Broadside Cruiser
Weak Against: TIE Bomber

Arguably the most powerful space-going vessel in the game, the Mon Calamari Star Cruiser is capable of tearing holes in almost anything the Empire can throw at it. It boasts firepower equal to that of an Imperial-Class Star Destroyer in its four turbolaser batteries and two ion cannons, and while it can't issue forth endless fighters and bombers, it does have the large advantage of not having a shield generator. Oh, there be shields on these ships, mind, they're just heavily redundant and thus not as vulnerable as those on other ships, so you won't have to worry about TIE Bombers knocking your shield generators out of commission and leaving you vulnerable.
Nebulon-B Frigate
Strong Against: Tartan Patrol Cruiser
Weak Against: TIE Bombers, Capital Ships
The Nebulon-B is one of the Rebellion's weakest ships, but it can still be quite useful in early skirmishes. It's not overwhelmingly powerful, obviously, but can profitably engage Acclamators. Thanks to their shield-boosting powers, they can engage in a firefight, then quickly recharge their shields (so long as they aren't the sole target of the enemy forces), making them good front-line ships to lead your fleet into battle.
X-Wing
Strong Against: TIE Bomber, TIE Fighter, TIE Scout
Weak Against: Tartan Cruiser, Broadside Cruiser
Ah, the X-Wing. Small, nimble, and fairly powerful, these ships are among the cream of the crop when it comes to fighter capabilities. There's not much to really say about them; task them on TIE Fighters or Bombers and let them do their thing. Their S-Foil ability, which lets them toggle on extra speed at the cost of power, is tremendously helpful in skirmish and multiplayer battles, since it'll let you get them over to mining facilities and claim them for yourself well before the enemy can reach them with their TIE Fighters.
Y-Wing
Strong Against: Imperial Star Destroyer, Victory Star Destroyer, Acclamator Cruiser, Interdictor Cruiser
Weak Against: TIEs, Frigates
The Y-Wing is the Rebellion's faithful bomber unit. In addition to powerful bombs that can bypass enemy shields, they also possess an ion blast attack that can impact enemy shields and disrupt them, causing them to instantaneously decrease in strength.
Z95 Headhunter
Strong Against: TIE Bomber
Weak Against: Tartan Cruiser, TIE Fighter, TIE Scout
The Z-95 almost isn't worth mentioning, as it's rarely seen in the game. This precursor to the X-Wing was a speedy ship, but lacked firepower and a hyperdrive. These aren't even available in the multiplayer game, so far as we can tell, and will only appear for a few space battles at the beginning of the Rebel campaign.
Hero Units
Hero units appear in Star Wars: Empire At War as especially powerful ground or space units. These guys are going to be more expensive than normal (in skirmish and multiplayer), but will be well worth using in the Campaign or Galactic Conquest modes, since they never permanently die. If they get killed in battle, then they'll simply regenerate over the course of a couple of galactic days.
Some of these units, such as Han Solo and Boba Fett, can be used both in space battles and on the ground, but most of them are restricted to one playing field or the other.
Rebellion Heroes
Mon Mothma
Space/Ground Unit
Special Abilities: Defensive Morale Boost
Mon Mothma was the Chief of State of the Rebel Alliance, taking up the post after Bail Organa, her primary partner in forming and organizing the Alliance, was killed in the destruction of Alderaan. She's not much for combat, instead focusing on rallying the troops.
As such, she has no peculiar combat abilities, save for the ability to cause a vague "morale boost" in other units while she's in a battle, which adds to their defense. This is best used in the comfort of space, where she, like a Fleet Commander, will usually take up residence on the biggest ship you have, although she may opt for a shuttle if you don't bring along a capital ship, in which case you'll have to protect her from enemy ships. She can be used in ground battles, as well, but she's incredibly vulnerable, since she just sits in a landing shuttle and can't move, allowing her to be pegged by enemy bombers or units.
Her primary benefit, however, is the fact that she cuts the purchase price of all units and buildings by 25% on the galactic campaign map. You can expect to shuttle her around quite a bit, since you'll want to have her wherever you queue up a large number of buildings or units, or have to build a new space station. Keep in mind that you pay for a unit when you add it to the queue, not when it actually starts getting built, so feel free to bring her to a system, queue up four or five units, then shuffle her off to another system and repeat the process there. Since you've already technically paid for the units at the first system, you'll gain her benefit without actually needing her there for the entire construction process.
R2-D2 & C-3PO
Ground Unit
Special Abilities: Control Turret, Repair Vehicle
This not-so-dynamic duo is, like Mon Mothma, not especially competent in ground battles, but can still be useful in certain situations. They have no offensive capabilities while on the ground, but can be used to repair damaged vehicles, and can also hack enemy turrets and convert them to your side. The drawback to this ability is that they have to get fairly close to the turret to use it, which will often leave them open to damage.
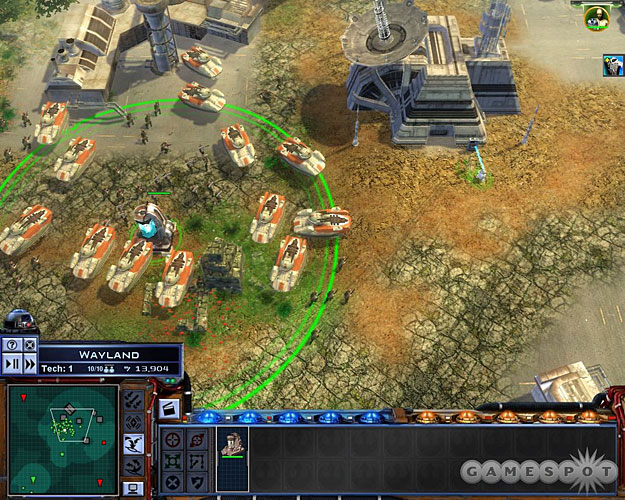
It's in space, however, that you'll want to concentrate on using R2 and C3. They're not capable of doing much in space battles, but they're great to use as technology thieves (by dragging them to the "Steal" slot on an enemy system), or just as spies. If you park them in a space slot above an enemy system, they'll be able to see the size of the fleets and garrisons there. While you'll only be able to see the most powerful unit in either stack, knowing the size should allow you to gauge whether or not an attack would be succesful. Of course, sometimes the computer inflates their stacks with numerous ground units, so you can't be sure whether you're going to be facing off against a bunch of ISDs or a bunch of shuttles. Variety is the spice of life, though. Be bold.
Red Squadron
Space Unit
Special Abilities: S-Foils, Lucky Shot
Red Squadron was the designation of the X-Wing squadron at the Battle of Yavin that featured a dream team of fighters, including Luke Skywalker, Wedge Antilles, Jek Porkins, Garven Dreis, and Biggs Darklighter. Its implementation into Empire At War is pretty interesting; although it appears as no more than a group of normal X-Wings, Red Squadron is, of course, a good deal more powerful than normal fighter units, and Luke himself can "use the Force" to make a Lucky Shot every minute or so, which does severe damage to one target of appropriate size. This attack does penetrate shields, so it's perfect to use on the shield generators of an Imperial Star Destroyer or the hangar bay of a space station.
The members of Red Squadron will get picked off one by one, obviously (with the appropriate sound effects, i.e. "Pull up!" "No, I can hold it together, I can - aghghghghgghh!"), but Luke will always be the last X-Wing standing, allowing you to use Lucky Shot until the unit reaches the bitter end. When he doesn't have any backup, though, he'll be a hot target, so he won't last long if you try to make him Lucky Shot an enemy starbase or something.
Captain Antilles
Space Unit
Special Abilities: Weaken Enemy, Boost Engine Power
Princess Leia's pilot, Captain Raymus Antilles (no relation to Wedge), pilots the formidable Sundered Heart, a modified Corellian Corvette. It's obviously of great use against enemy fighters and bombers, but also possesses a handy energy-draining ability that can target a number of ships inside a specific radius, in addition to the standard engine-boosting ability that lets him escape from combat in seconds.
Kyle Katarn
Ground Unit
Special Abilities: Sprint, Thermal Detonator
In a delightful little nod to Star Wars gaming history, Empire at War features an appearance from Kyle Katarn of the Jedi Knight series of games. Given that the game takes place before the destruction of the Death Star, though, this is more of a Dark Forces-era Kyle Katarn, though, before he discovered his Jedi roots and became one with the Force and all that.
As such, Kyle plays more like a commando than anything else. He's capable of taking down most infantry units with one hit from his blaster, and can also toss a thermal detonator onto buildings and vehicles to destroy them. If you're trying to hit a vehicle, though, make sure that your target isn't actively moving, or else you will likely miss your throw and wind up tossing your detonator onto the ground.
Han Solo & Chewbacca
Space/Ground Unit
Special Abilities (Space): Invulnerability
Special Abilities (Ground): Sprint, EMP Burst, Capture Vehicle
Han Solo and Chewbacca are an inseperable pair, and indeed are deployed with both characters as part of the same team.
In space, they pilot the Millenium Falcon, the fastest ship in the galaxy. Actually, it's slower than an X-Wing with S-Foils activated, but it's still pretty speedy, and does a good number on enemy fighters, although it's perhaps not quite as adept at taking down ships as Slave I is. To make up for this, though, it packs an Invulnerability power which renders the ship temporarily immune to damage.
On the ground, you'll be able to control both Han and Chewbacca individually and separately. As you might expect, they're both hardy units capable of dealing significant damage to enemy infantry, and they each have abilities capable of countering enemy vehicles, as well. Han, for instance, has his devastating EMP Blast, which will shut down any nearby vehicles or turrets for around 45 seconds when he sets it off. He needs to be in the middle of a group of vehicles to get the most use out of this, but it's still worthwhile, especially since you can usually Sprint to where the EMP will be most effective before setting it off. Note that this doesn't actually deal any damage to the vehicles, so you'll need to follow it up with Plex Soldiers or some other kind of unit capable of actually hurting vehicles if you don't want them to all just reactivate when the EMP runs out and start pounding you again.
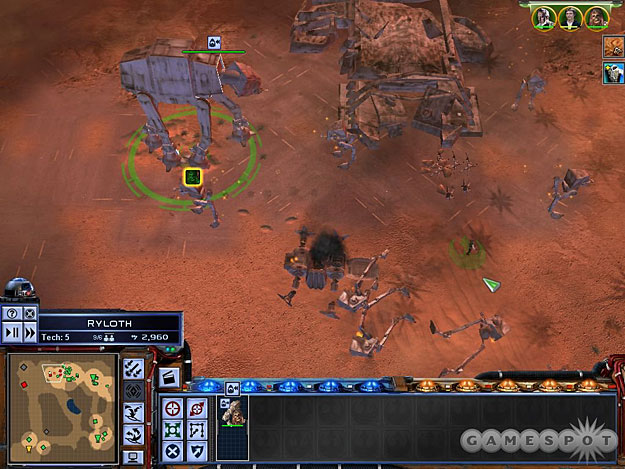
Chewie, for one, has his Capture Vehicle ability, which can be used to take over enemy vehicles and convert them to your cause. When you click on the ability, then click on an enemy vehicle, Chewie will run up to it and hop inside, allowing you to control the vehicle thenceforth. You'll lose Chewie's services as a ground unit, but the vehicle that you take over will gain an instant recharge to full health (in the single-player campaign, at least), and if you ever need to, you can just leave the vehicle to regain Chewbacca as a ground unit. If you do, the vehicle will be destroyed. This move sounds incredibly cool, but in reality, it's probably best used only on AT-ATs, since they're the only vehicle really worth expending a lot of effort in stealing, or against enemy artillery, which are likewise fairly valuable. If Chewie's about to get killed, you can also use it as something of an escape vector; just plop him into a vehicle and take off.
Commander Ackbar
Space Unit
Special Abilities: Concentrate Fire, Boost Shield Power
Like Captain Piett and his Star Destroyer, Ackbar commands his own, specially modified Mon Calamari Star Cruiser, called Home One. After the assault on Hoth, Home One would become the mobile headquarters for the Rebellion, but at the time of Empire At War, it presumably hadn't quite achieved any real notoriety. It's still a pretty kickin' ship, though.
In addition to the standard (and incredibly useful) Boost Shield Power ability, Ackbar also has his own special Hunter's Mark, called Concentrate Fire, which allows his ship and all nearby friendly shipsto target all available firepower on the target. Note that Home One, unlike most other Mon Calamari Cruisers, does have a shield generator, making it more vulnerable to enemy bombing attacks than other Cruisers.
Obi-Wan Kenobi
Ground Unit
Special Abilities (Ground): Force Heal, Force Protect
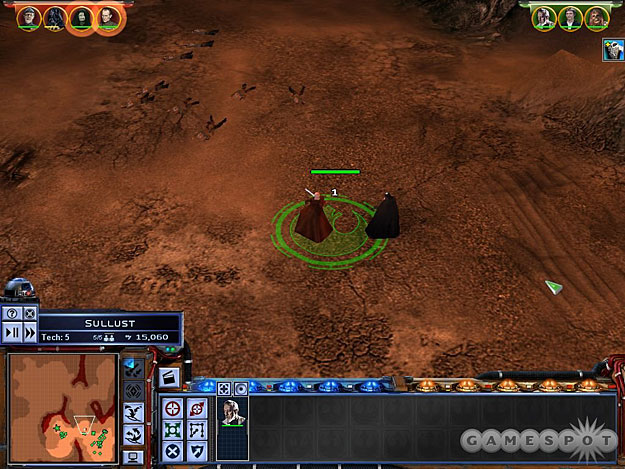
The old General Kenobi is still alive and kicking in the era of Empire at War, and is more than capable of leading your ground troops into battle. He's not quite as invulnerable as Darth Vader is, being something of an old man at the time of the game, and he will definitely take more damage from regular blaster fire and enemy vehicles. Luckily he has his Force Heal ability, which will heal all of your infantry (and Obi-Wan himself) of a great deal of damage when used. (He also automatically heals all nearby infantry automatically for a small amount every few seconds.) This makes him a stellar unit to use at the head of an infantry army when going up against computer opponents; let them focus on Obi-Wan while your Plex Soldiers rip through their vehicles. If anyone takes any damage, just repeatedly Force Heal to bring them back up to full health, or close to it. Obi-Wan can't bring units back from the dead, though, so if a squad loses most of its soldiers, it may be best to let them die and free up the population space that they represent.
Force Protect is another little micromanagement tool that experienced RTS players will probably enjoy having at their disposal. If another unit on your side is getting hammered by the enemy forces, you can use Obi-Wan's Force Protect ability to reduce the damage that it's taking, hopefully to the point where you can let it escape from the path of danger.
Galactic Empire Heroes
Emperor Palpatine
Ground Unit
Special Abilities: Force Lightning, Force Corrupt
Palpy. The Palpstinator. Yngwie Palpsteen. Palpatine has a lot of nicknames, mostly given to him by his grandkids, but at the end of the day, there's nothing quite like being called "The Emperor." And sometimes, when you face a rebellion against your control of the entire galaxy, you just have to get down and dirty and bust a few heads.
Like Mon Mothma, Palpatine will reduce the cost of any construction or units at his current location by 25% when he's at a system on the galactic map. He doesn't participate in space battles, but instead focuses on busting out with his lightsaber on the ground. In ground combat, he takes more damage than Vader does, but he's capable of making most of that back due to his automatic health-leeching ability, which will steal the life from nearby infantry units and add it to his own. In addition, he also gets Force Lightning, which can kill large numbers of units in one shot, and Force Corrupt, which can convert enemy infantry to your side. Corrupted infantry will fight for you as long as they live, but they will slowly drain health over time.
Overall, Palptastic is an incredibly strong unit when used against infantry, but you'll have to back him up with anti-vehicle units if you except armored resistance.
Darth Vader
Ground Unit/Space Unit
Special Abilities (Ground): Force Crush, Force Push
Special Abilities (Space): Call For Reinforcements
The Emperor's lapdog is about as powerful a ground unit as you're going to find in Empire at War, as Darth Vader is capable of absolutely annihilating armies almost single-handedly, especially in the single-player campaign. (He's probably toned down a bit in the multiplayer game.) He can shrug off basically any infantry damage, including the rockets from Plex Soldiers, and most vehicles are barely capable of damaging him, as well. If you're looking to take him down when you fight him, you'll have to either mob him with vehicles, preferably while he's standing near an anti-infantry turret, or hit him with artillery fire, or drop a bombing run on his head, if possible.
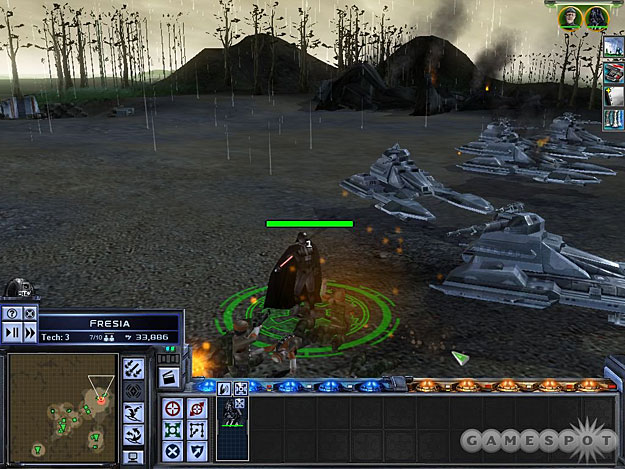
Regardless, in addition to his formidable defenses, Vader also has a pair of useful abilities. Force Crush will allow him to pick up most vehicles and destroy them by imploding them with telekinesis, while Force Push kills all infantry units near him on the map.
In space battles, Vader pilots what appears to be a squadron full of TIE Advanced x1 fighters, which are a bit better than the normal TIE Fighters that are flown by other pilots. He can take down most fighter or bomber wings without problems, but his squadron will get hit by fire when they're engaged in large firefights. Luckily, Vader is always going to be the last fighter in the squadron to die, and as long as he's alive, he can use his Call For Reinforcements ability to bring in more fighters to help him. This ability has an extremely long timer, though, so you won't be able to use it more than once in a long fight. If you think he's about to get clobbered, it's best to remove him from the fight altogether and give his ability time to recharge.
Colonel Veers
Ground Unit
Special Abilities (Ground): Maximum Firepower, Deploy Stormtroopers
It's not really truthful to say just "Colonel Veers" here; we should really say "Colonel Veers and ten tons of metal death", because Veers isn't just any other infantry unit. He comes equipped with a fully armed and operational AT-AT.
Like other AT-ATs, Veers is capable of withstanding large amounts of damage, can fire from long range with excellent power, and can deploy stormtroopers to the ground from the belly of the beast. In addition, though, he has the Maximum Firepower ability, which can be used on either a vehicle or a building. When activated, Veers' AT-AT spits out a steady stream of laser fire, damaging all units in a line around a target vehicle, or doing severe damage to the targeted building, usually destroying it outright.
Boba Fett
Ground/Space Unit
Special Abilities (Ground): Flame Thrower, Jetpack
Special Abilities (Space): Seismic Charge
Boba Fett? Boba Fett? The galaxy's most feared bounty hunter is back in action for the Empire in Empire At War, and whether you're on the ground or in space, he just wants to have a little fun. He's roughly analogous to the Millenium Falcon in space, as he pilots around Slave I; he can do a number on enemy fighters and bombers, whether it's with his laser cannon or his Seismic Charge bomb. He's not so hot against enemy capital ships, and can't take a lot of damage, but he's uitable for attacking hardpoints after a capital ship's shields have been dropped.
On the ground, Boba Fett is more than capable of dealing with enemy infantry. His Jetpack ability allows him to quickly move around the battlefield, and his Flame Thrower is similar to Palpatine's Force Lighting; in that it can sweep across multiple infantry units and kill most normal Infantry or Plex Soldiers in a matter of seconds.
Mara Jade
Ground Unit
Special Abilities: Thermal Detonator, Force Corrupt
Although The Emperor's Hand would eventually wield lightsabers, Mara Jade in the time of Empire At War is still reliant on blasters to get her message across, even if she does have some Force training, courtesy of Palpatine. She's a ground-only unit, and roughly equivalent to Kyle Katarn in power (she even shares his Thermal Detonator power). Instead of Sprint, however, she obtains Force Corrupt, another borrowed power (this time from the Emperor).
Captain Piett
Space Unit
Special Abilities: Proton Beam, Tractor Beam
As the man who would eventually command Vader's flagship, the Executor, Piett was always a capable officer, and during the time of Empire At War, he was in command of an Imperial Star Destroyer. Like General Veers' AT-AT, this Star Destroyer is capable of the same functions of a normal Star Destroyer, but has a powerful Proton Beam attack that can swiftly disable most hardpoints or just do a whole lot of damage to enemy ships.
Planets
You're going to be fighting on many different planets in Star Wars: Empire At War, but sometimes it's difficult to know the properties of a planet until you've conquered or explore it. Since most planets are greyed out before you reach them, you might want to take a look at the chart on this page to get an idea of what's in store for you before you conquer a planet - sometimes you might want to focus your resources on a seemingly insignificant planet to gain a benefit that will impact your forces throughout the galaxy.
| Planet | Weather Effects | Benefit |
| Abregado-Rae | Rain | Production Bonus: AT-ST |
| Aeten II | Volcanic Ash | Higher Credit Production |
| Alderaan | Rain | 50% Damage Reduction for Rebel Infantry Units |
| Alzoc III | Snow | Higher Credit Production |
| Anaxes | Rain | Production Bonus: Victory Star Destroyer |
| Atzerri | Clear Skies | Black Market: Credit Production Fluctuates |
| Bespin | No Surface | Higher Credit Production |
| Bestine | Rain | Production Bonus: Acclamator Cruiser |
| Bonadan | Clear Skies | Higher Credit Production |
| Bothawui | Rain | Reveals Tactical Information for Nearby Systems |
| Byss | Rain | 20% Firepower Boost for AT-ATs |
| Carida | Clear Skies | Production Bonus: Infantry Units |
| Corellia | Rain | Production Bonus: Corellian Corvettes |
| Corulag | Rain | Production Bonus: Infantry Units |
| Coruscant | Clear Skies | Higher Credit Production |
| Dagobah | Rain | Base Stealth: Ground |
| Dantooine | Rain | Base Stealth: Ground |
| Endor | Rain | Imperial Light Armor Upgrade (see note below) |
| Eriadu | Rain | Production Bonus: T-4B Tanks |
| Fondor | Sandstorm | Production Bonus: Assault Frigates |
| Fresia | Rain | Production Bonus: A-Wings |
| Geonosis | Clear Skies | Production Bonus: MPTL-2A |
| Hoth | Snow | Base Stealth: Ground |
| Ilum | Snow | Production Bonus: SPMA-T |
| Jabiim | Rain | Repulsorlift Vehicles Can't Land On Surface (This Planet Only) |
| Kashyyyk | Rain | Base Stealth: Ground |
| Kessel | Clear Skies | Higher Credit Production |
| Korriban | Clear Skies | Production Bonus: 2-M Repulsor Tank |
| Kuat | Rain | Production Bonus: Imperial Star Destroyer |
| Manaan | Rain | Infantry Units Automatically Heal (This Planet Only) |
| Mon Calamari | Rain | Production Bonus: Mon Calamari Star Cruiser |
| Naboo | Rain | 25% Damage Bonus for T4-B Tanks |
| Nal Hutta | Rain | Black Market: Credit Production Fluctuates |
| Polus | Snow | Higher Credit Production |
| Ryloth | Sandstorm | All Stormtroopers Get 35% Health Bonus |
| Shola | Volcanic Ash | Infantry Take Damage Automatically During Ground Battles (This Planet Only) |
| Sullust | Volcanic Ash | Production Bonus: Tartan Patrol Cruisers |
| Taris | Clear | Production Bonus: T2-B Tank |
| Tatooine | Sandstorm | 25% Armor Boost for T2-B Tanks and Speeders |
| Thyferra | Rain | Infantry Units Automatically Heal (This Planet Only) |
| Wayland | Clear Skies | 15% Speed Boost for T4-B Tanks and MPTL-2As |
| Vergesso Asteroids | No Surface | 25% Damage Bonus for X-Wing, Y-Wings, A-Wings and Z-95 Headhunters |
| Yavin 4 | Rain | 25% Shield Bonus for X-Wing, Y-Wings, A-Wings and Z-95 Headhunters |
Notes
Imperial Light Armor Upgrade: All AT-STs, AT-AAs, and TIE Maulers get a 15% chance to reflect incoming laser fire.
Production Bonus: When you control a planet with a Production Bonus for a certain type of unit, all of your planets will be capable of building that unit for 20% less than they normally would. This bonus stacks with the added production bonus from Mon Mothma and Emperor Palpatine. Note that you'll sometimes control planets that offer production bonuses for enemy units; this doesn't net you any particular gain, but it's still worth controlling the planet, to keep your foe from taking advantage of the bonus.
Weather Effects
- Clear Skies: No effect on combat.
- Rain: All Lasers take a 50% accuracy reduction during combat.
- Sandstorm: All rocket weapons take a 50% accuracy reduction during combat.
- Snow: Most units get a 50% reduction to their sight range.
- Volcanic Ash: Infantry units get a 50% reduction to their sight range.
Using Shield Generators
One of the ways Empire At War makes it easy for players to defend planets lies in its inclusion of shield generators for planets. If you take the time to build a shield generator, you'll be able to fire at enemy units outside of it, but they won't be able to fire into it until they walk through. So if you line up as many of your units near the edge of the shield as possible, you should be able to turn it into something of a shooting gallery. If you add Turbolasers to the planet, they'll often be in just the right position to fire on vehicles as they come under the shields, as well.
The Highest Bidder
This video walkthrough for the Rebel mission "The Highest Bidder" shows you what you need to do: follow the pirate ship until it's disabled (either by your fire or that of the Imperial forces), move the Sundered Heart to its location to retrieve the data, destroy or avoid the Star Destroyers, and then finally destroy the Interdictors to escape the system.
Heading to Carida
Late in the Rebel campaign, you'll have to escort Han and Chewie through the Imperial stronghold on Carida in order to retrieve the plans for the Mon Calamari Star Cruiser. You'll only have the two smugglers to defeat hordes of Imperial Stormtroopers and vehicles, but with a little ingenuity, you'll be able to use Chewie's "Capture Vehicle" ability to turn the tables a bit.
One In A Million
This video details the final battle above the Death Star and its eventual destruction, and shows the final cinematic for the Rebel Campaign. Victory here is somewhat easy; all you have to do to defeat the Death Star is destroy the small fleet that protects it, kill any space stations in the system, and have the Red Squadron hero unit alive at the end of the fight. If you do all that, then victory is automatic.
Commence Primary Ignition
At the end of the Imperial campaign, you'll be able to use the Death Star to blow away numerous Rebel strongholds. When they've all been completely blown away, there'll be no further threats to your rule, allowing Darth Vader and Emperor Palpatine to relish their victory in one of the Death Star docking bays.
Got a news tip or want to contact us directly? Email news@gamespot.com
Join the conversation