

In this article we will see step by step how to install GNU Linux Debian 12 (Bookworm) in text mode using a reduced type ISO image for network installations (netinstall) which can be downloaded from the following page.
ISO Debian 12 bookworm netinstall amd64 (debian-12.X.X-amd64-netinst.iso)
We can do this installation on both physical and virtual computers. If you want to install it on a physical computer, you can use a USB stick properly prepared with software to serve as installation media. Here are two links to articles that talk about these tools in case you need them.
Tools to prepare USB sticks for installation or boot live CD (ISO to USB)
Prepare USB memory with Balena Etcher
In this case we will carry out the installation in text mode (without a graphical environment). This type of installation is recommended for installing servers.
![]() HP MicroServer Gen10 Plus Tower Server para pequeñas empresas, Intel Xeon E-2224 3.4GHz hasta 3.4GHz Turbo, 32GB RAM, 4TB Fast SSD, RAID, Windows Server 2019
HP MicroServer Gen10 Plus Tower Server para pequeñas empresas, Intel Xeon E-2224 3.4GHz hasta 3.4GHz Turbo, 32GB RAM, 4TB Fast SSD, RAID, Windows Server 2019

Minimum hardware requirements to install the system
- 64-bit microprocessor with AMD64 architecture in this case with at least 1 core
- 256 Megabytes of RAM
- 4 Gigs of hard drive space
The system can work with the requirements listed above, but if we assign more to it it will work even better. Keep in mind that if you are going to use this system to set up a server, you must assign the resources according to the operation it will have.
Linux Debian 12 (Bookworm) Installation Process
To begin the installation process, you must insert the installation media to be used (CD, DVD, USB Flash Drive, ISO image, etc.) into the computer and have the computer boot from it (boot from the installation media). We recommend disconnecting the network connection from the computer being installed to make the installation complete faster and avoid connection-dependent mishaps. Once the installation is finished, you can connect the network again and use it.
Once the computer boots from the media prepared for installation, a screen like the following should be displayed. Here we will select the second option “Install” using the arrow keys on the keyboard.
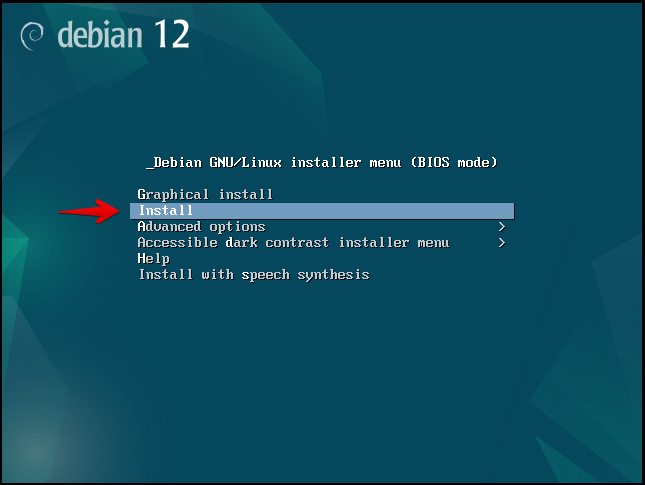
Once this option is selected, we will press the enter key to continue. The following screen should appear in which we will be asked to select the desired language for the installation. We choose the language from the list using the up or down arrows on the keyboard again
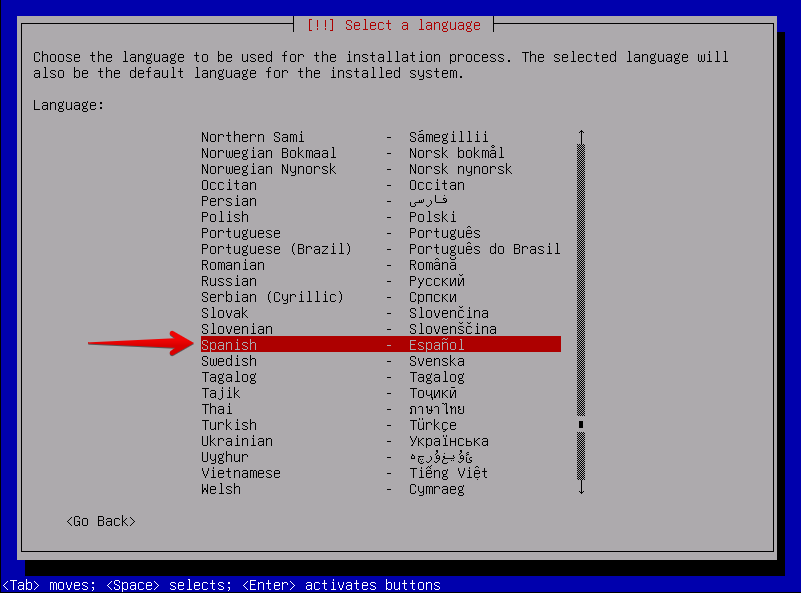
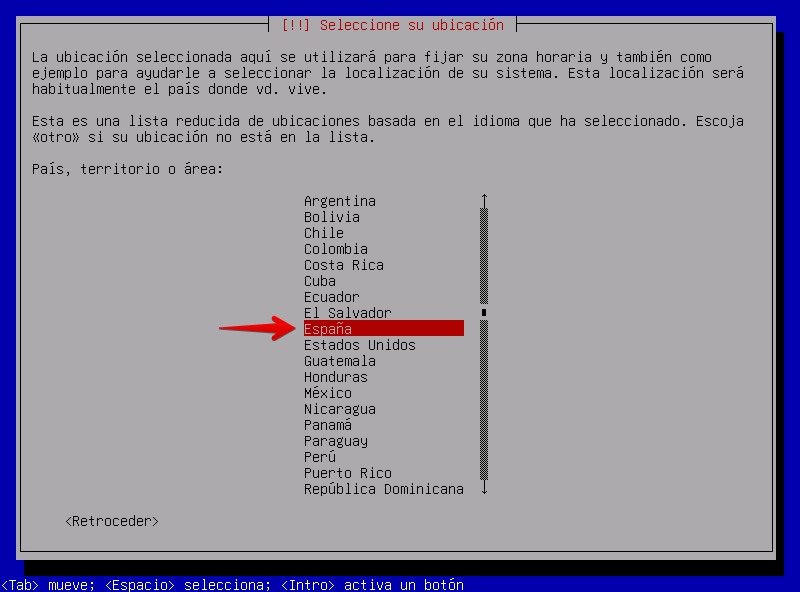
Once the language has been selected, we press enter to continue to the next step, which is to select our geographic area. In this case you must select the one that is appropriate to where you are located.
With your area selected, the next step is to select the language or keyboard layout you want to use. In our case, we select Spanish, since our keyboard is in Spanish. Feel free to choose the one that best suits you.
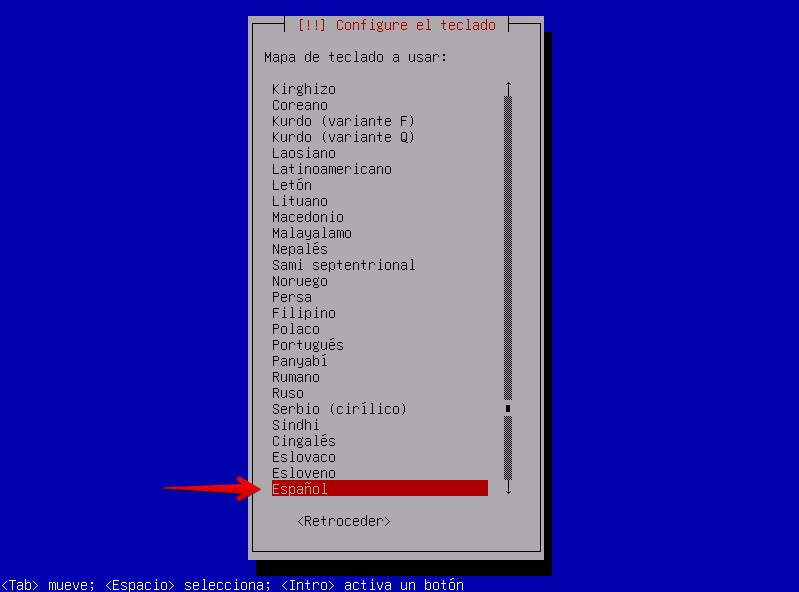
Once you have chosen the keyboard language to use, press enter to continue the process and wait
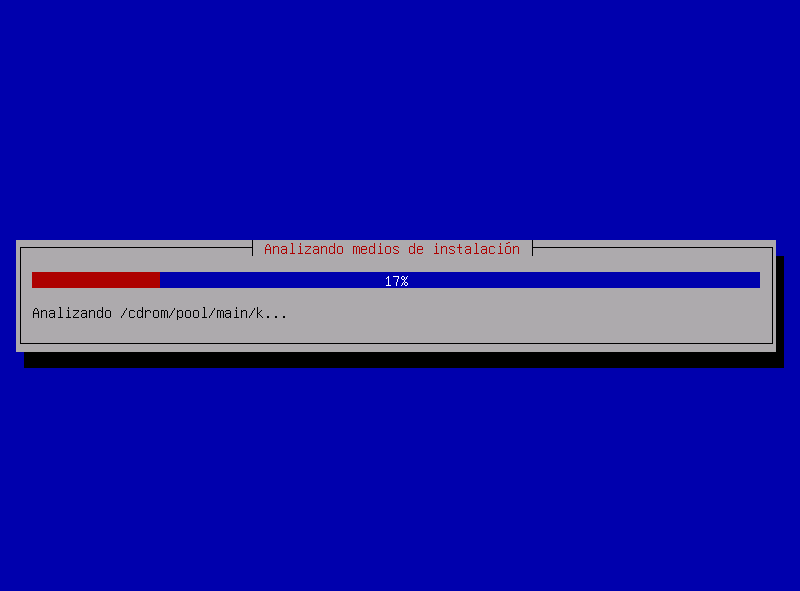
When the process is finished, the system will try to do automatic network configuration. In case of failure, a screen like the following should be displayed
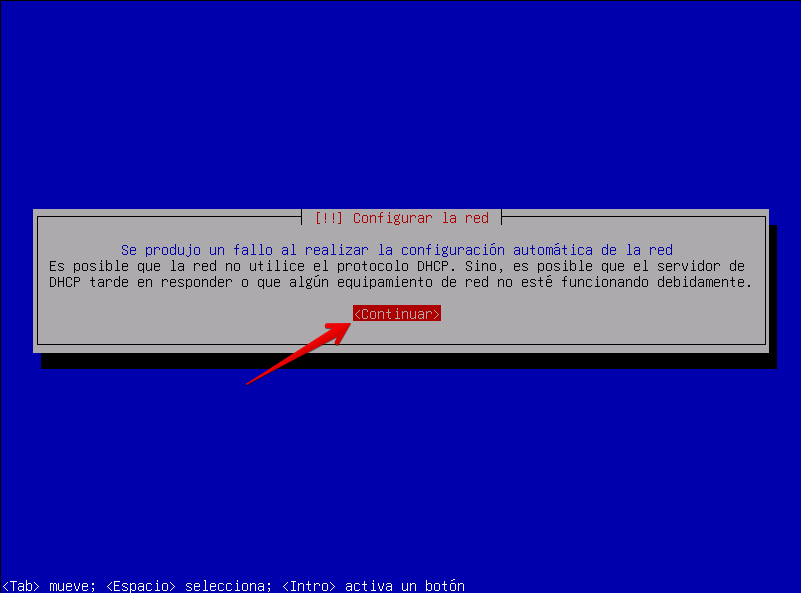
Here it informs us that we must configure the network manually, so we press enter to continue
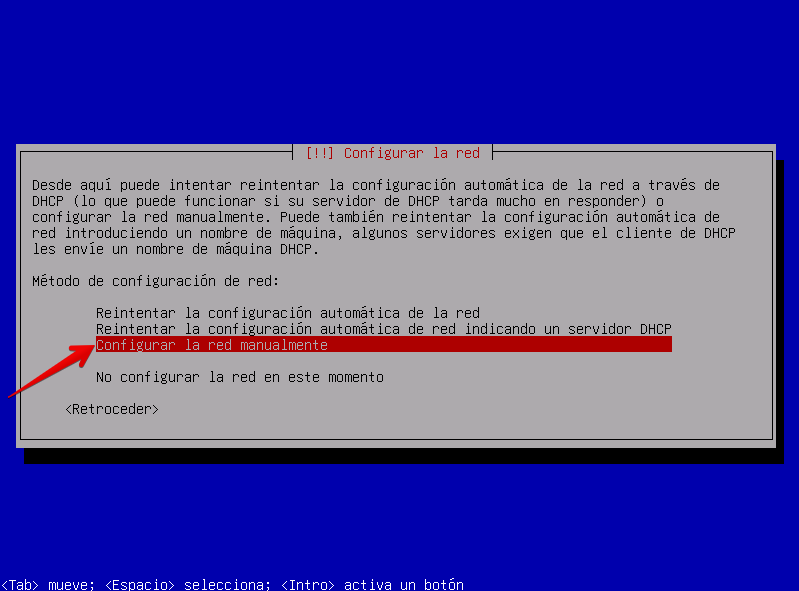
We will select the “Configure the network manually” option and press enter again
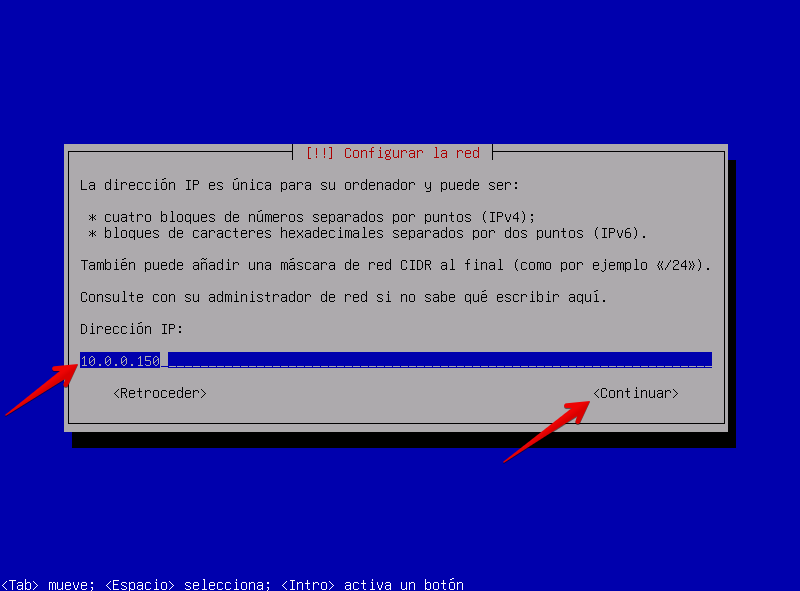
On this screen the installer asks us to enter the IP address that the system will use. We enter the desired IP and select the “Continue” option and press enter
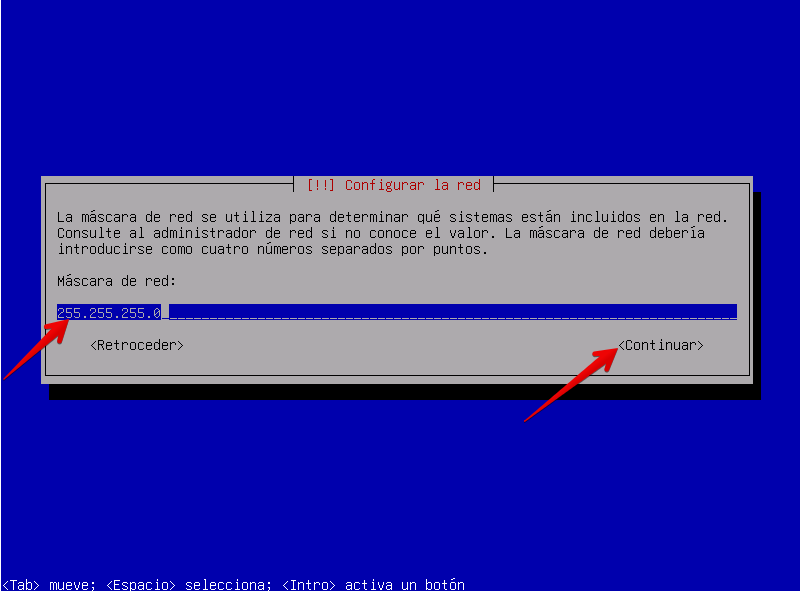
On the next screen we will be asked to enter the network mask that the system should use
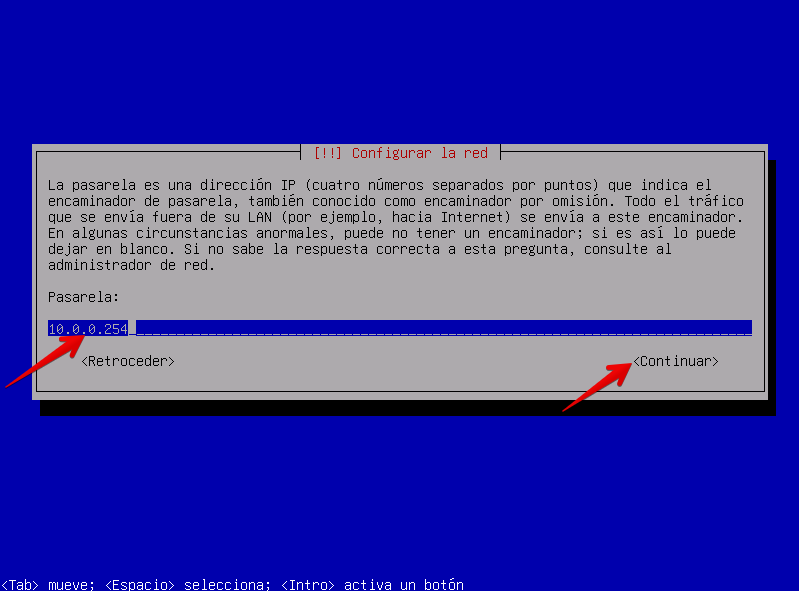
The next thing it will ask for is the IP of the gateway, which is the address of the equipment that will route the network traffic that is sent outside the local network.
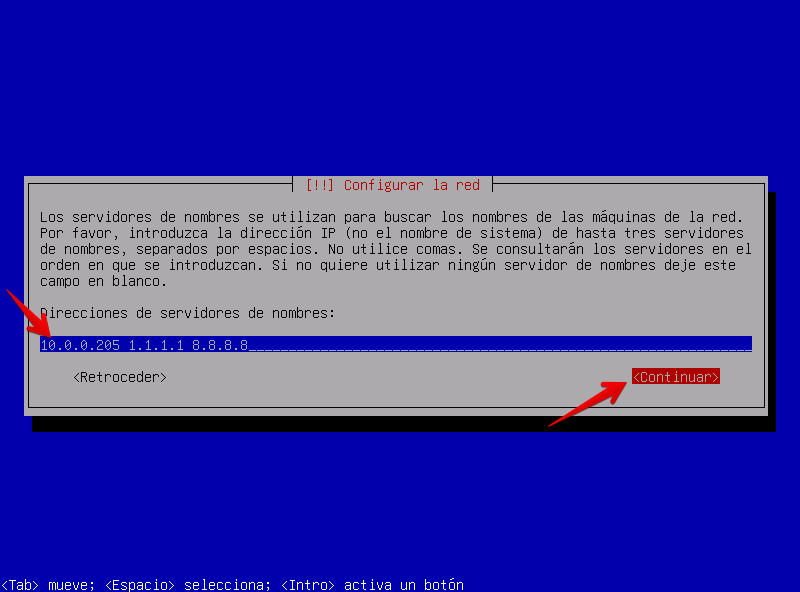
Next, the Linux Debian 12 (Bookworm) installation wizard will ask us for the IP addresses of the DNS servers that we will use. In our case we have 10.0.0.205, 1.1.1.1 which is from Cloudflare and 8.8.8.8 which is from Google. Both 1.1.1.1 and 8.8.8.8 are public DNS servers on the Internet that we can use so that our computers can resolve the necessary DNS queries with them.
In the next step the installation wizard will request the name that our device will have, so we enter it and select the continue option.
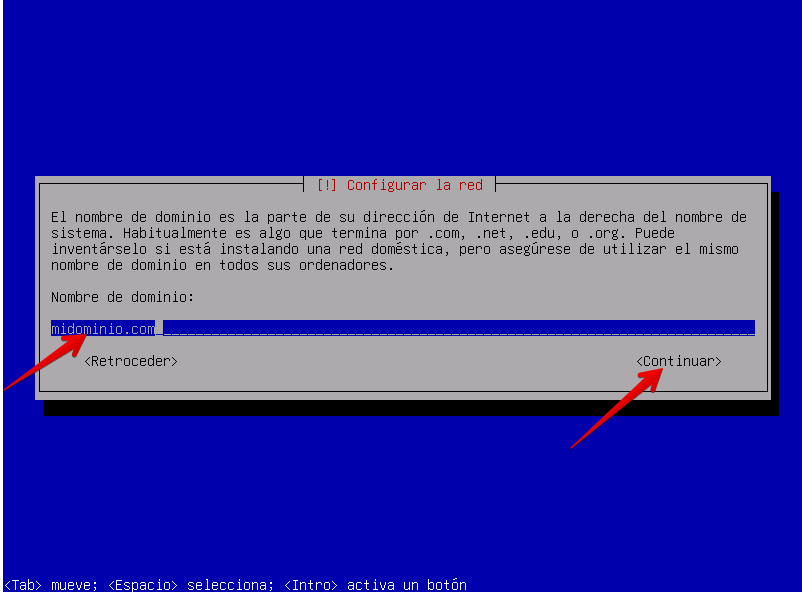
Next, we will be asked what domain our team will be part of, so we provide it and select the continue option
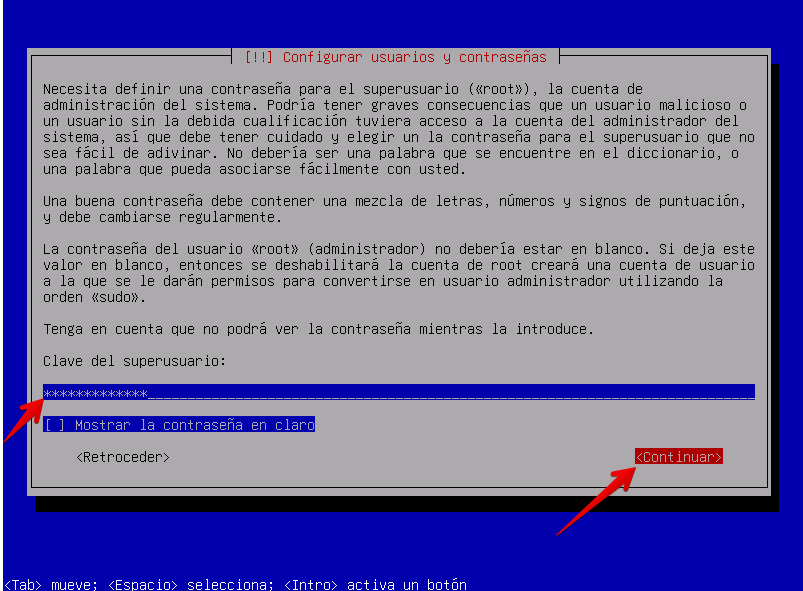
The next step is to establish the password that the root user will use , that is, the system administrator user in Linux. We must use a strong password that we do not forget.
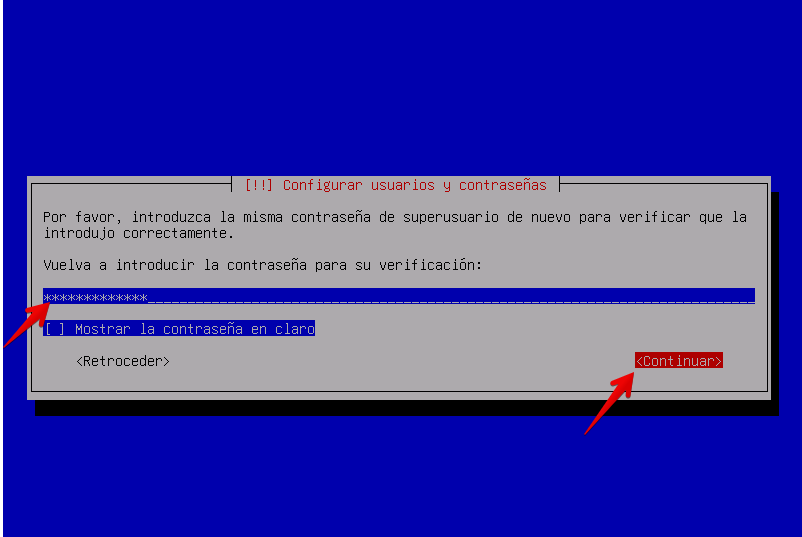
The next step is to confirm the password as shown in the following image
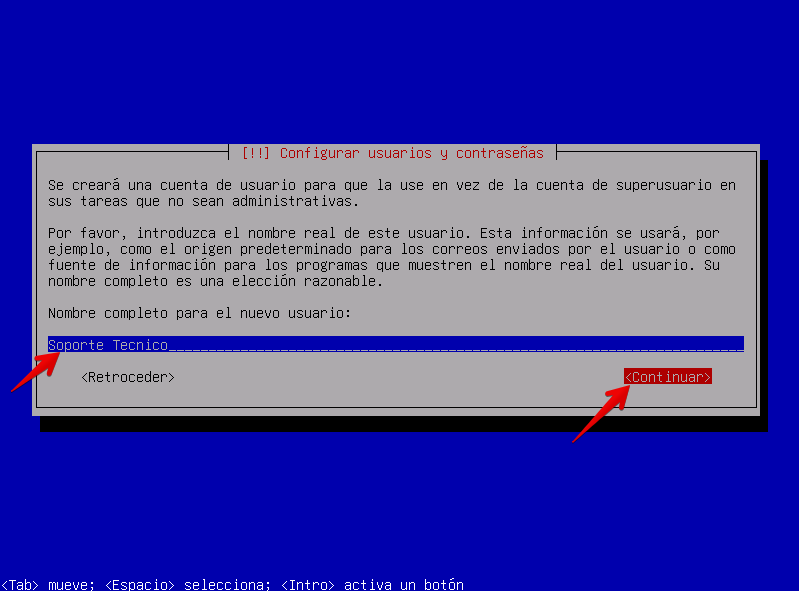
In addition to configuring the root user, the installation will ask us for data to create a user account for tasks that do not require administrative privileges. In this case we will create the user for which we will work and as the first piece of information it will ask us for the name that the account will have.
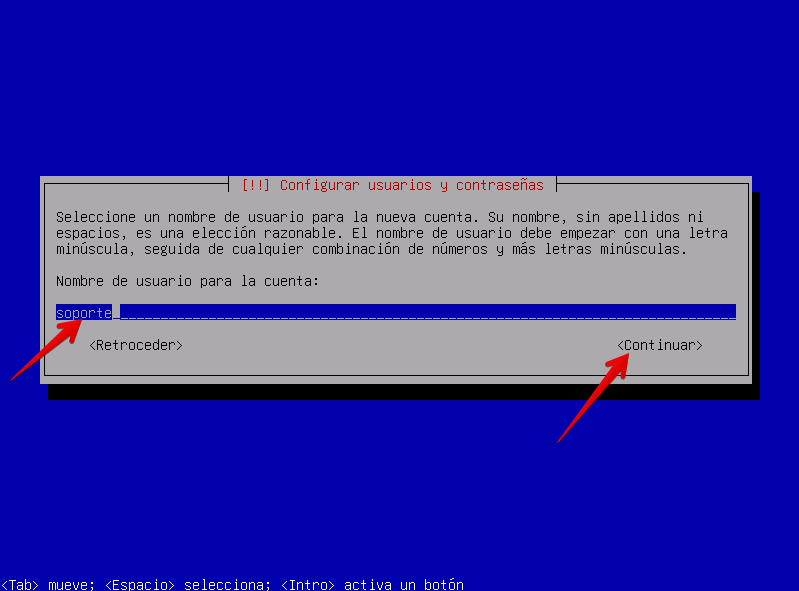
Next, it will ask us for the user who will have that account to be able to access the system.
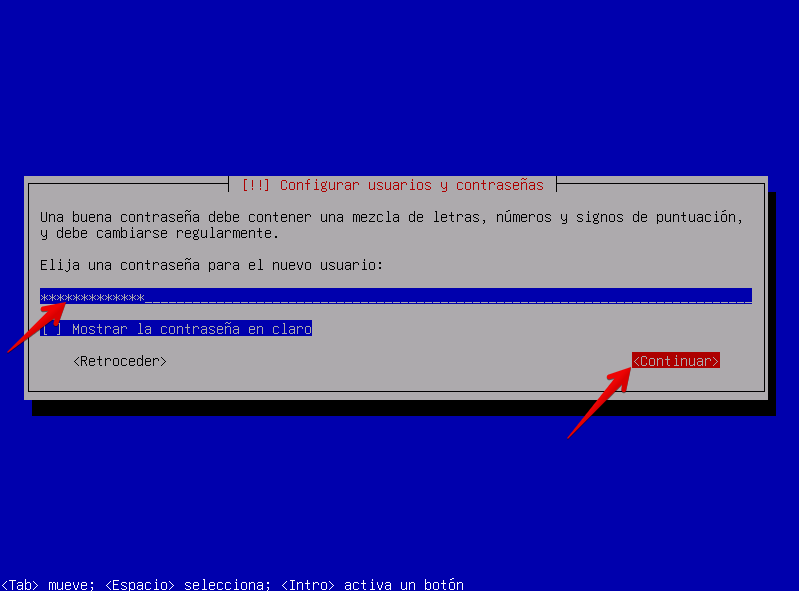
The next step is to establish a password to be able to access the system using the user specified above
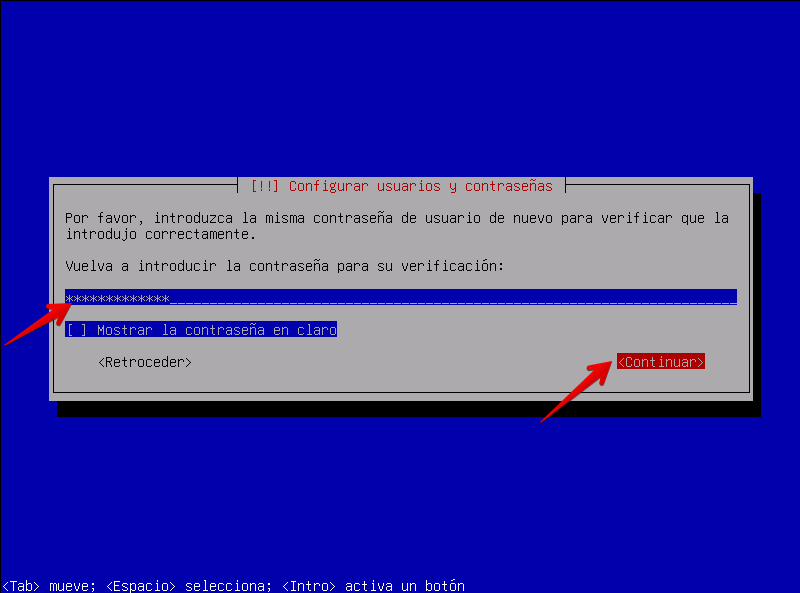
And we confirm the password again
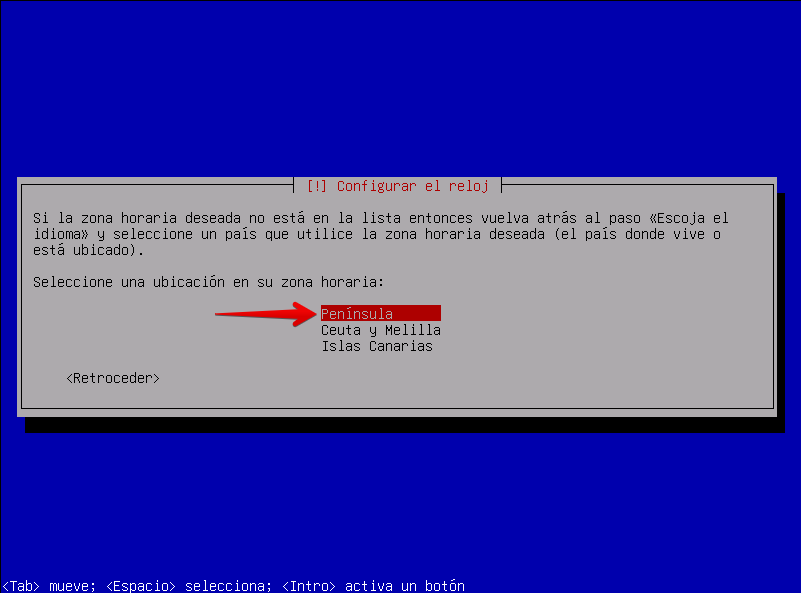
The next step is to select the time zone that we will use. This selection depends on the geographical area that we select at the beginning of the installation wizard. This is a value that can be changed from the system once installed.
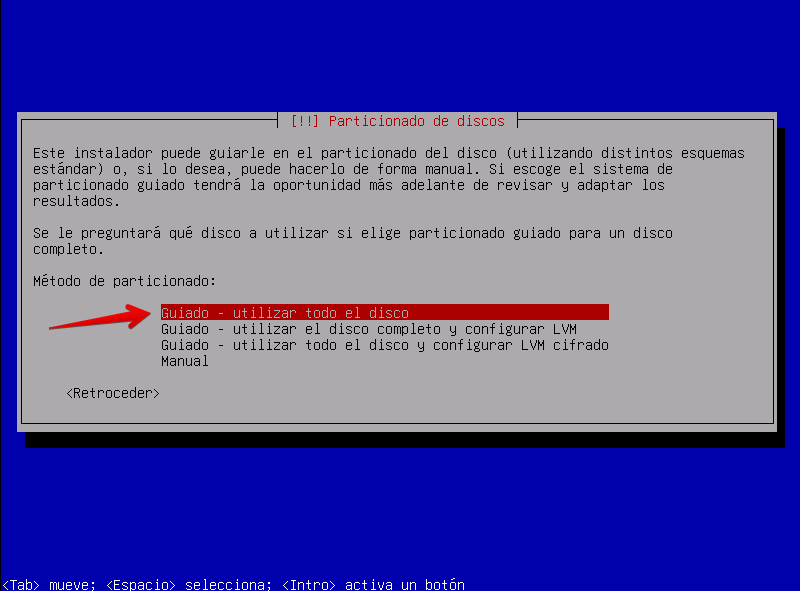
We wait for the next step to be carried out to load and a screen like the following image will appear. There we will choose the disk sharing method that we will use. In this case we will choose the “Guided” method which will use the entire disk to install the system
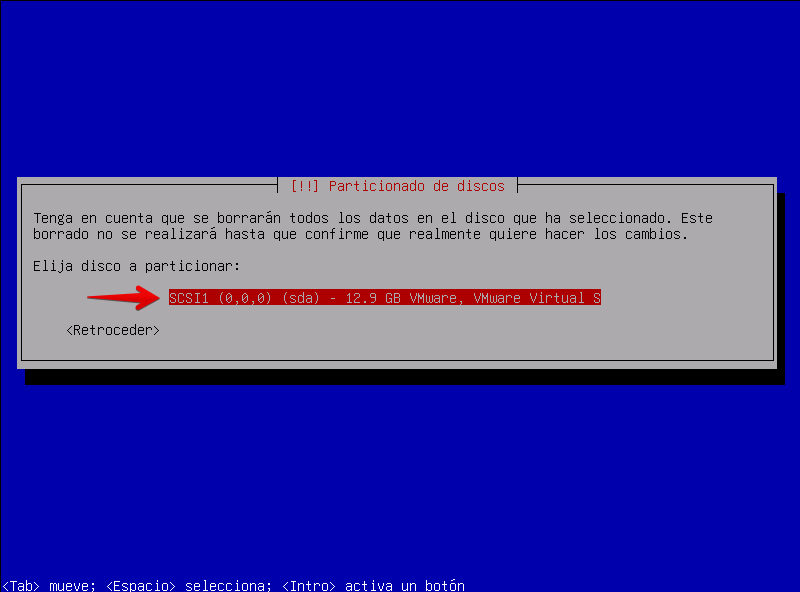
Once the method is selected, we press enter to continue to the next step, which consists of selecting the disk that we are going to partition. In our case we only have one disk, but it could be the case that your computer has more than one disk and you will have to select which disk the partitions will be made on. So we select the disk and press enter to continue.
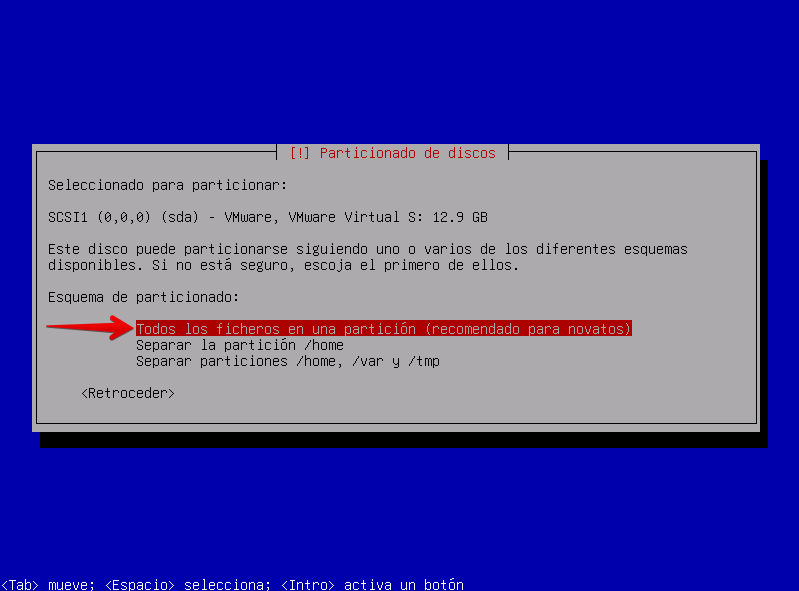
Next, we select the partitioning scheme for which we will use the first option “All files in a partition” and press enter to continue.
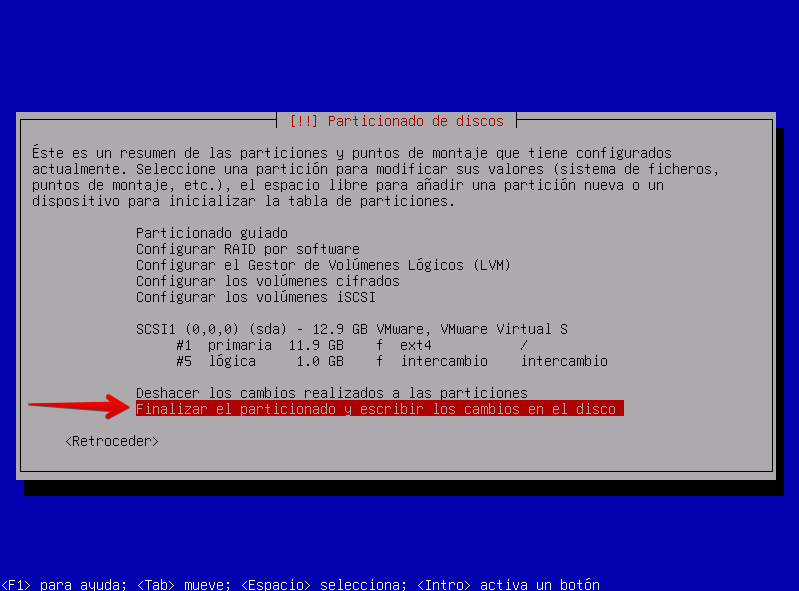
The installation wizard will create the partitions and an image like the one shown below will appear. There we will select the option “Finish partitioning and write the changes to the disk” and press enter to continue
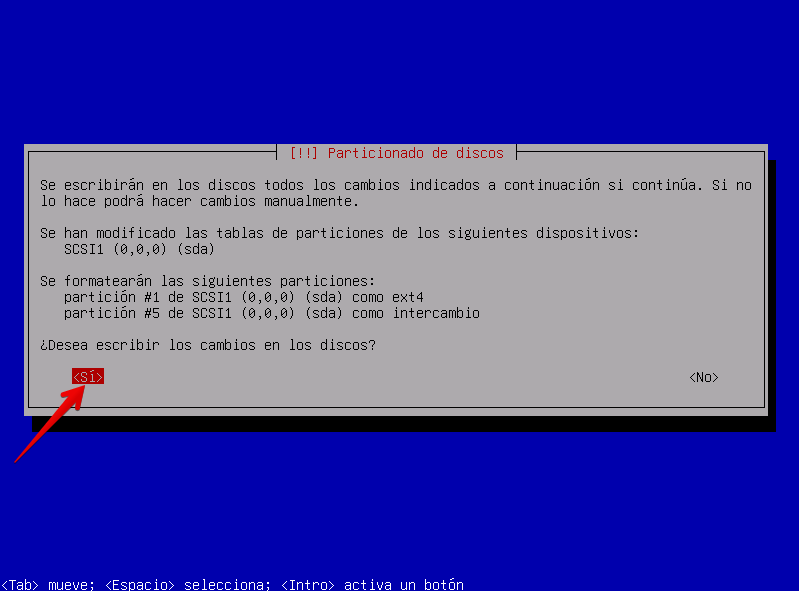
We will be shown a confirmation like the following in which we have to select the option yes and press enter
Soon, the wizard will ask us if we want to analyze any additional installation media, to which we will answer no and continue

We will be asked if we want to use a network replica, but for now we will select the back option and press enter, after which we will get a confirmation like the following
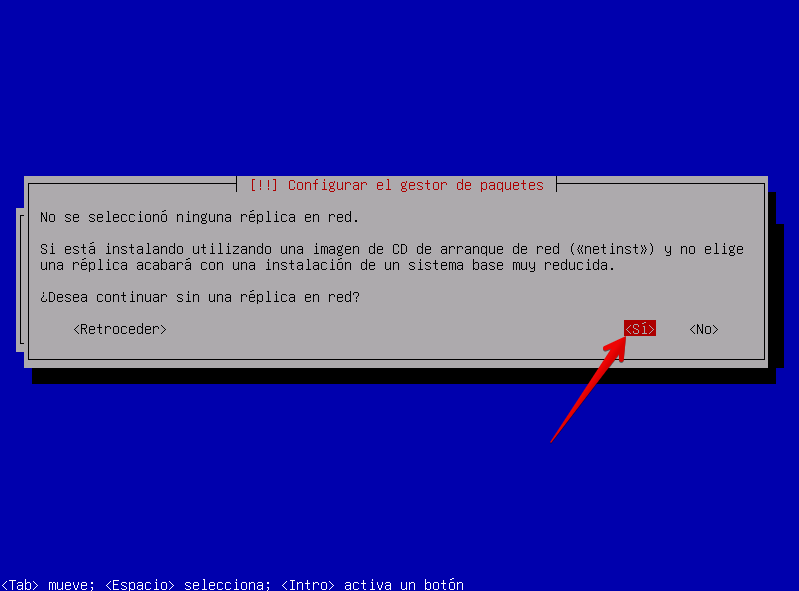
In this confirmation we are asked if we want to continue without a network replica, to which we will answer yes and press enter to continue.
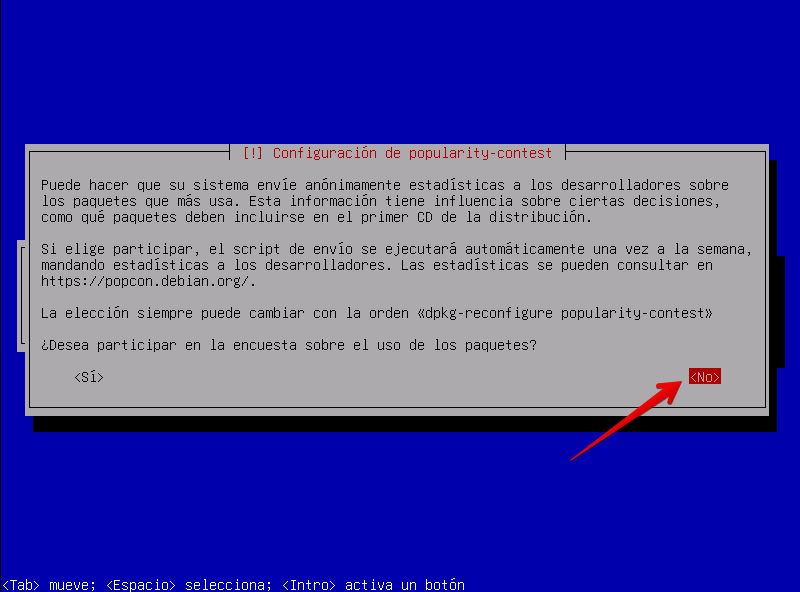
The wizard will ask us if we want to participate in an anonymous software package usage survey. For now we will answer no and press enter to continue
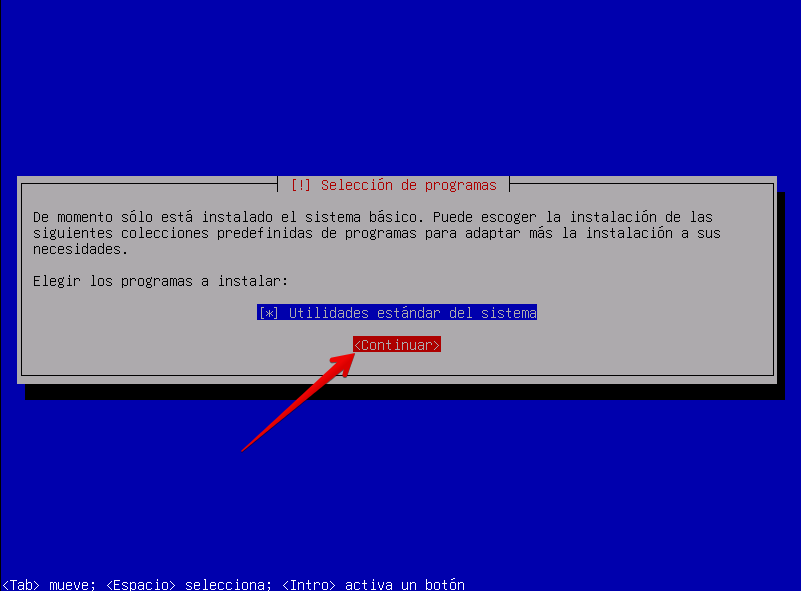
The next thing is to select the additional software to be installed. On this disk, as it is a reduced version of the installation, only “Standard System Utilities” will appear. Here we must make sure that it has the asterisk within the two brackets and select the continue option and press enter
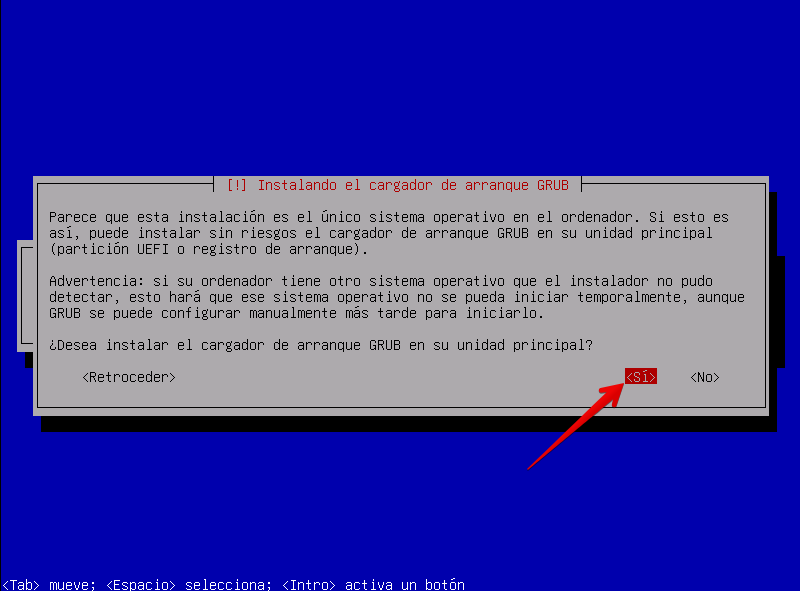
We are almost done with the installation. In this step the installer asks us if we want to install the boot loader on the main disk to which we will answer yes and press enter to continue
The next thing is to select the device where the bootloader is to be installed.
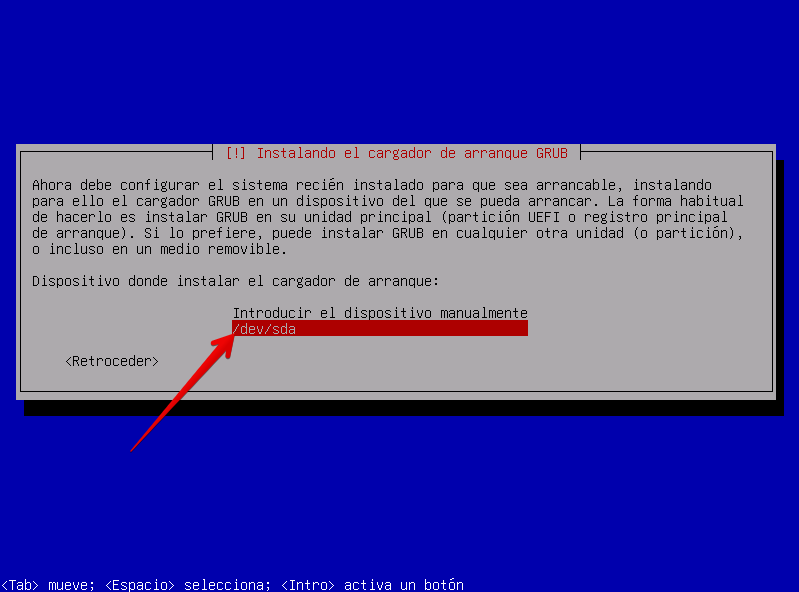
In this step we will select the main disk which is /dev/sda and press enter to continue
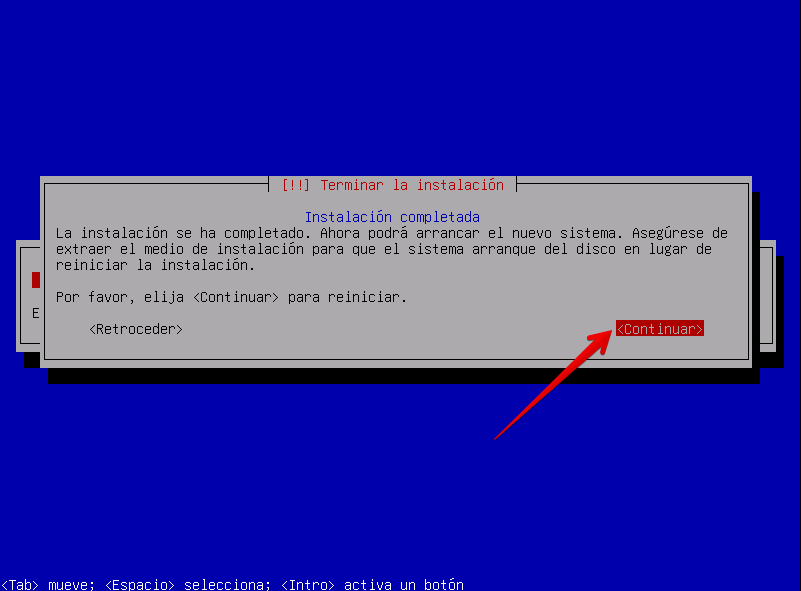
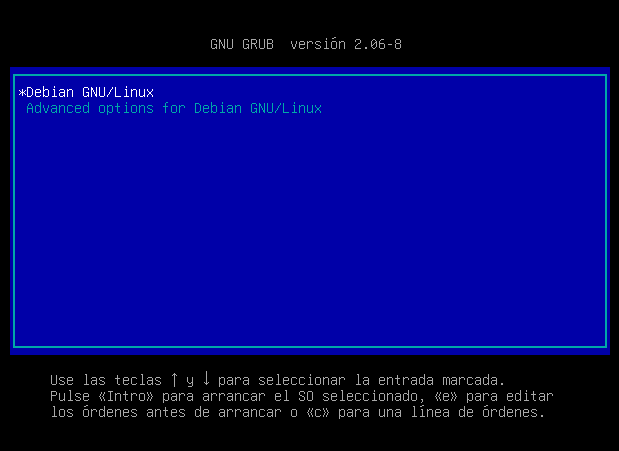
Now that we have reached this point, the installation of Linux Debian 12 (Bookworm) has been completed and all that remains is to select Continue and press enter for the system to reboot. If everything has gone correctly it should load as shown in the following image
We wait a few seconds and we can now see the access login of the newly installed system as shown in the following image.
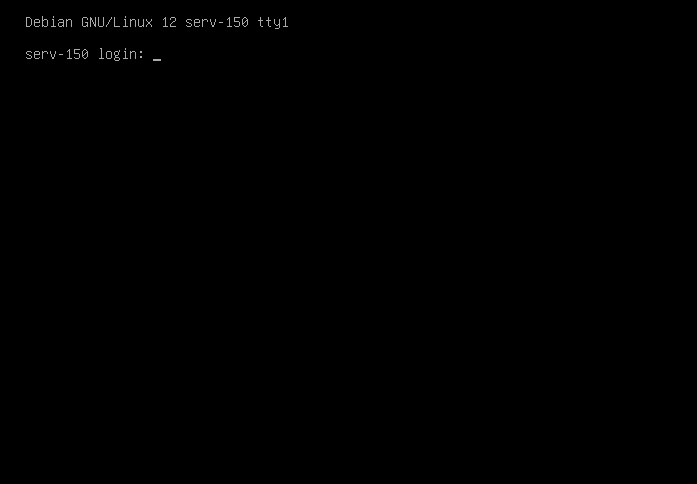
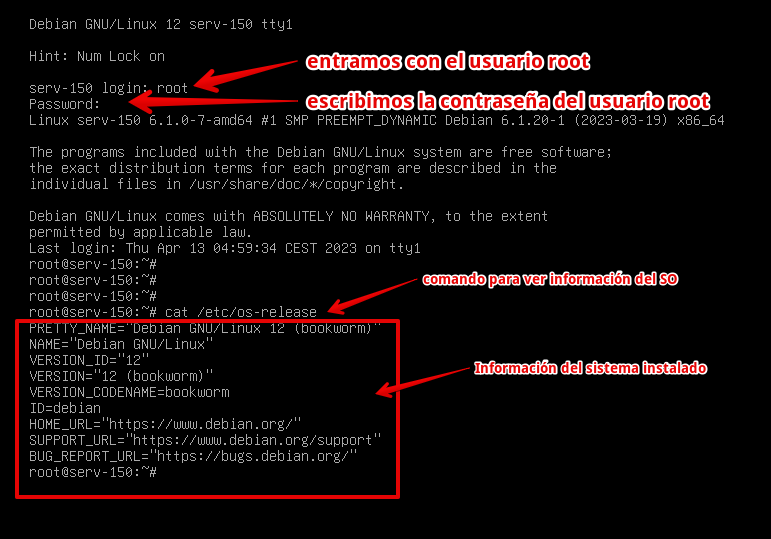
Once here we can enter the root user and enter his password, the one we entered during the installation to access.
Once we access the system we can see its information by executing the command:
cat /etc/os-release
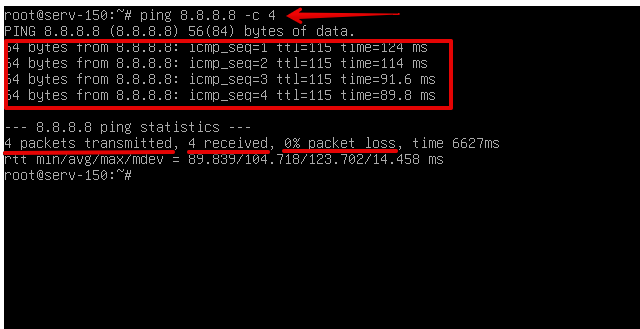
The system is now installed, so we can enable the network connection again and try to see if we have a network connection by pinging Google’s IP 8.8.8.8 with the command ping 8.8.8.8 -c 4 . If everything has gone well we should obtain responses as seen in the following image in which it is seen that 4 packages have been sent, 4 have been received and 0% loss.
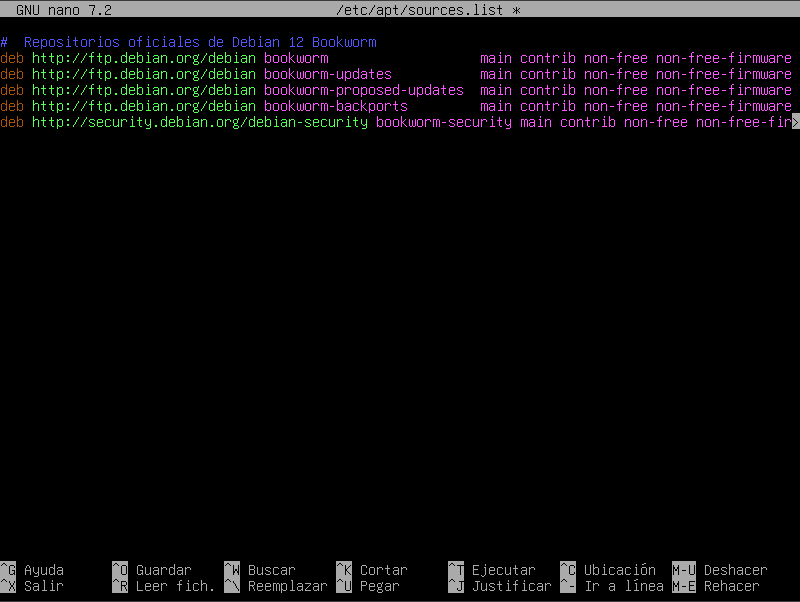
The next thing we can do is update the software repositories configuration file for which we will execute the command nano /etc/apt/sources.list

We must delete the content of the file and leave it as follows
Then we press Ctrol+X to exit and when it asks us if we want to save the changes, we press S. Finally enter to write the file and return to the console.
The content of the repositories configuration file should be like this shown below
# Official Debian 12 Bookworm repositories
deb http://ftp.debian.org/debian bookworm main contrib non-free non-free-firmware
deb http://ftp.debian.org/debian bookworm-updates main contrib non-free non-free-firmware
deb http://ftp.debian.org/debian bookworm-backports main contrib non-free non-free-firmware
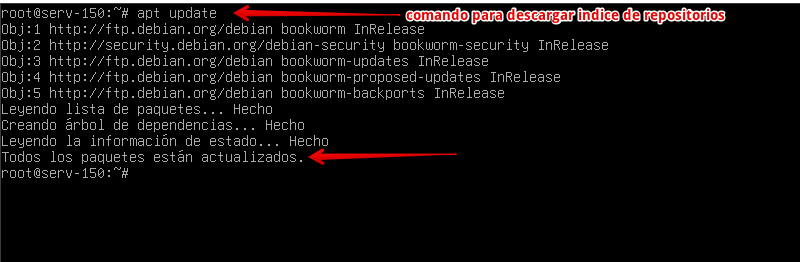
deb http://security.debian.org/debian-security bookworm-security main contrib non-free non-free-firmwareOnce the file has been edited correctly, the index of the software repositories should be loaded using the apt update command which should produce an output as shown in the following image
If everything has gone well we can then make use of the software repositories and have several software utilities installed (mc ssh byobu wget curl htop btop iotop nload). We do this with the command apt install mc ssh byobu wget curl htop btop iotop nload and press enter. You should see an output as shown in the image below
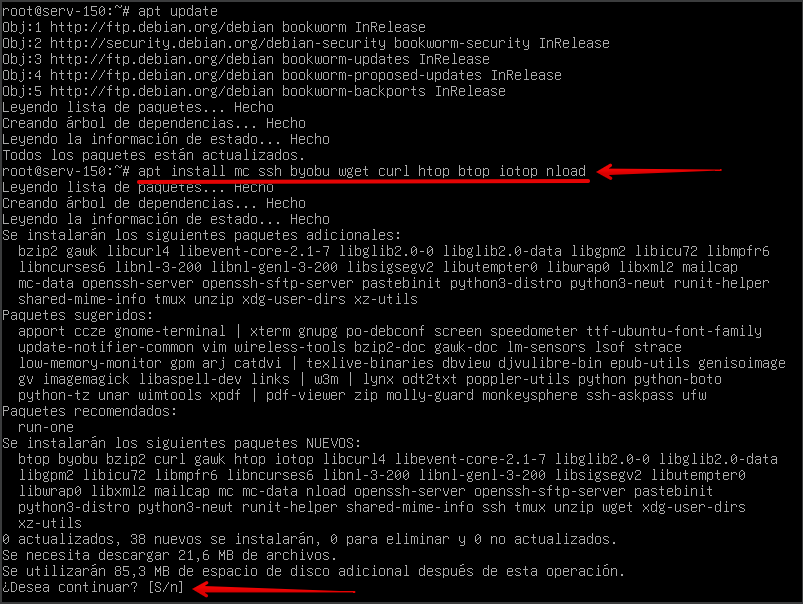
There the system asks us if we want to continue with the installation of the aforementioned utilities, to which we will answer Y and wait for their installation to complete.
Once completed, we can run one of them, which is htop, which will show us a screen like the following one in which we can see the resource consumption in real time as shown in the image.
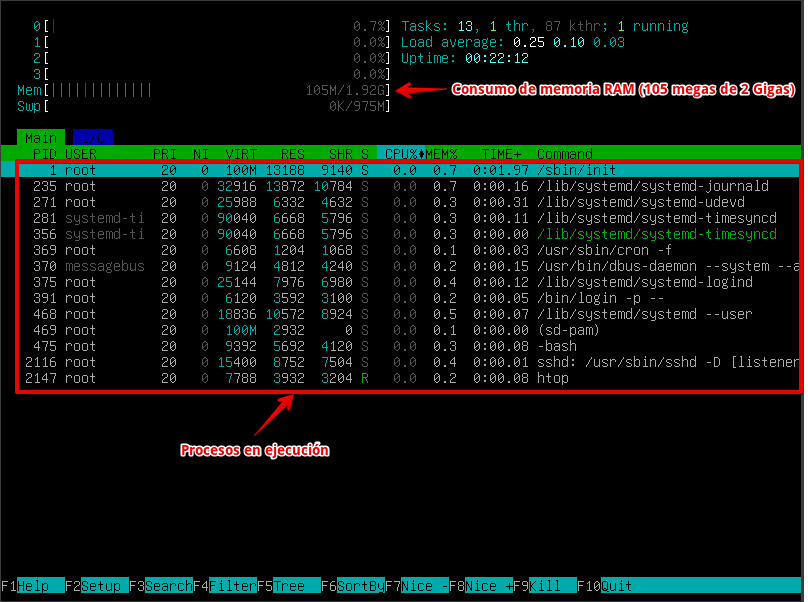
To exit the tool we press F10.
This concludes this article with a step-by-step installation of Linux Debian 12 (Bookworm) in text mode. We hope you liked it and feel free to leave us your comments about it.
https://amzn.to/40yDhiy